Thursday, May 24, 2012

A New Wharram Melanesia Video on Youtube


We've seen just a little bit of JIPE98's Melanesia before, but he's really cooking in this one.  The blurb beneath the video states that he hit 8.4 knots on this run from Ouemo to Uere, New Caledonia.  That's really cooking for a 16' outrigger canoe!

The video appears to have been shot handheld by his crew, and details of his one-handed steering setup hover just outside the frame.  But there are some stills of the canoe from above at the end of the video, and she's a very nice-looking example.

I look forward to seeing more of this Melanesia in the future.  It looks like he's got a great boat, and a beautiful setting to sail in.


Meanwhile, in my own build, I wasn't able to apply further coats of epoxy to my fiberglass-taped fillets yesterday because a cold front blew through, bringing 50°F temps and a day of much-needed rain.  So I continued stitching the second rope to my sail, which is almost complete now.  Today looks favorable for epoxy work - higher temperatures, at least, and the rain has ended.  So I hope to be able to finish coating the fillet glass today, and move on to installing the decks tomorrow.

Tuesday, May 22, 2012

Glass Tape Success

The last time I worked with fiberglass tape on my brother's Bolger Teal build, it was a complete debacle.  We ended up with kinked, gappy glass that really wasn't doing the joint any favors; after getting about 20% of the chines done, we abandoned the glass tape all together.  So it was with some trepidation that I began taping the fillets on my Melanesia.

Surprisingly, it turned out really well, and I was able to do all three fillets in a single 90-minute session.  I was using a cheap disposable paint brush (bristles, not foam) and unadulterated epoxy.  Here's the process:
  • Cut a piece of fiberglass tape to the proper length for each section.
  • Mix a small batch of epoxy, so it doesn't thicken before you get the chance to use it all.  
  • Brush epoxy over one section of fillet and the surrounding ply, a little wider than the width of the tape.
  • Apply the tape to the fillet.  Get the position right, then press the tape into the epoxy.  
  • Smooth it out with gloved fingers, being careful to press it firmly against the fillet and wet it out thoroughly.
  • Brush more epoxy over the cloth until it looks uniformly wet and transparent.
  • Repeat for the next section of fillet, mixing more epoxy as necessary.
Looking back at our bad experience on the Teal, I think the difference lies in the smooth fillets.  We were trying to glass a sharp corner on a curved line, and the glass just didn't like taking that shape.  It was like folding paper - you can bend paper, and you can crease it, but you can't bend creased paper.  So the glass wrinkled. 

The glass will all but disappear when it gets
a couple more coats of epoxy over it.
The fillets are smooth curves, and the curve of the chines are smooth as well, so the Melanesia doesn't ask the glass tape to do anything it can't do, and the process is much easier.  But I am glad I put in all that work to get the fillets ready.  I suspect it would have gone badly if I'd been trying to glass over the undulations and lips they had before the sanding.

When the epoxy is set but not entirely cured, I'll brush another coat or two over it until the weave of the cloth is completely encased.  And just like that, the interior fillets will be done.

Monday, May 21, 2012

The Joy of Sanding

On the list of books nobody ever wrote, The Joy of Sanding has to be pretty near the top.  It's simple drudgery.  But if you don't like sanding, you probably shouldn't build a boat, and if you build a boat despite your dislike for sanding, you can't really expect anyone to feel sorry for you. 

Power tools make any task go by more quickly, but the odd angles and precision required by sanding the interior fillets on the Melanesia hull just don't work well with any power sander I can think of.  So if you're doing all the work, you'll want to make sure you have the right tools for the job.

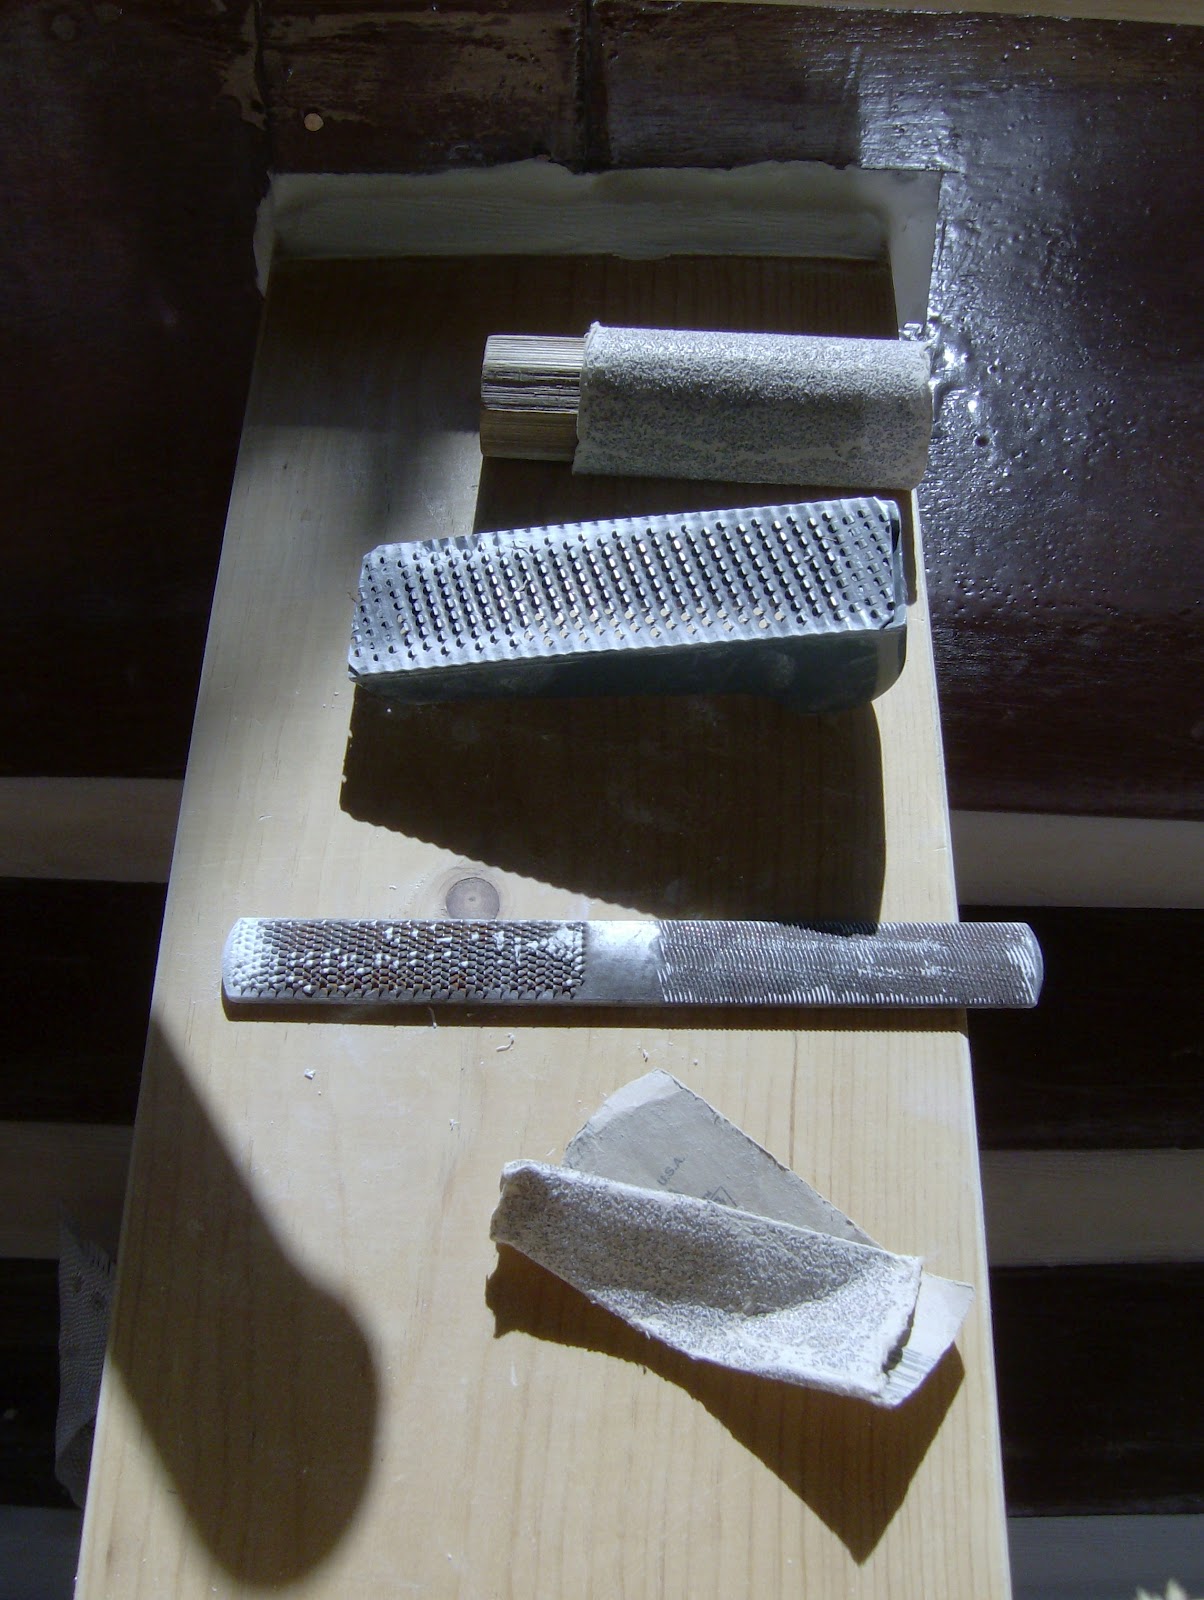
When I stepped onto the porch this morning, I found this unintentional still life on the center thwart.  These are the tools I've been using to smooth my fillets, laid out of the way while I vacuumed the dust out of the hull.  I've been using these tools:
  • coarse (60 grit) sandpaper wrapped around a rough cedar dowel that might end up as a T-handle for one of my paddles, for sanding the curved fillets;
  • a SurForm (surface-forming) plane;
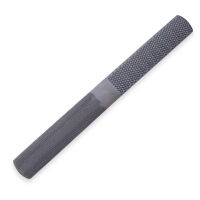
  • a 4-in-hand rasp that I think I found in the street years ago.
  • and a folded scrap of 60 grit sandpaper for the fine work
Of these, the 4-in-hand rasp has been the most useful.  It's great for knocking down high spots, and I've found that it chews up the fluffy fillet epoxy nicely, but doesn't really dig into the pure epoxy coating on the wood, so it's great for smoothing down the raised edges of the fillets where I peeled back the masking tape.

The point of all this is - of filleting in general, and of sanding the fillets smooth in particular - is to provide a very smooth, gently curved transition from one panel to the other.  Well-supported fiberglass tape has excellent tension strength, but if you put a hard corner in it, or leave a gap beneath the tape, you're creating concentration of stresses that will eventually become a point of failure.

The good news is that it's not finish sanding.  The epoxy will fill any scratching left behind by the coarse sandpaper or the even coarser rasp. 

Anyway, in my own build, I'm almost done sanding and hope to put the first glass tape on today.  That's a real milestone, and I'm excited to move beyond the fillets to the next stage of things.

Friday, May 11, 2012

Sail Progress: Bolt Rope Installed

With some weird late-winter weather interrupting our early summer, I've been able to spend some time sewing the bolt rope into the edge of my sail without feeling guilty: surely you don't expect me to work on the hull when it's 43°F and raining?!?

The bolt rope is an actual rope sewn into a hem along the edge of the sail.  It provides a simple way to reinforce the edge so that stresses are well-distributed without a complicated seam.

Tonight, I put the finishing stitches in.  For those of you keeping track at home, that's about 26' of hand-stitching. Sewing is not my strong suit, so it was tough work.  I actually missed the infernal device!  But the sail really looks like a sail now.

There's still more rope to sew on, but that goes outside the hem, and is merely sewn/lashed to the interior bolt rope at 6" intervals.  I suspect it will be quicker work.  Before I can do it, though, I'll need to buy some line at the local hardware store. I don't have enough of the used polypro rope I pulled out of a trash can to complete the job.

I'll try to pick up that line, and maybe some sandpaper, tomorrow. And if this weather holds, I might just pull out the infernal device again to sew on my sail numbers and Wharram insignia, too.

Wednesday, May 9, 2012

More Sailmaking

For some reason, I'm loathe to break out the sandpaper and finish the fillets in my hull.  But time's a-wasting, so I need to make some sort of progress on the boat.

There's still the sail to work on, so this morning my son and I broke out the infernal device the sewing machine.  We retouched some segments of the center seam that were sloppy or crooked, or where the machine skipped stitches.

Then we got out the batten, and sketched in the hollow in the leach (mouth?) of the sail.  I triple-checked to ensure that it really was cut that way, and not just shown curved in the drawings because that's how it looks when you're sailing.  But no, I'm pretty sure that's actually how it should be cut.

So we sketched and cut the hollow, then hemmed it to a length of polypropylene webbing.  It looks much more like a crab claw sail with that curve in place.

The next step will be to hand-stitch the bolt ropes into the seam along the head and foot of the sail, and again outside the seam.  That rope will be used as eyelets when we lace the sail to the spars.

Speaking of spars, I picked up three impressive lengths of straight, dead aspen at a friend's cabin last weekend.  I haven't decided yet if they're to be spars or kiato, or some of each.  But they represent some more non-hull progress.  So even though I'm avoiding the fillets, I'm still moving the project forward.

Tuesday, May 1, 2012

Budget Update

I mentioned recently that I was out of glass bubbles (an important filleting additive) and getting low on epoxy.  So I've placed another order with Merton's, to the tune of $67.24.  This brings the epoxy lineitem in my budget up to $243.76, and the total cost thus far to $595.89. 

For those of you keeping score at home, that's around $150, or roughly 33%, over the initial budget estimate, which I arrived at by converting Wharram's budget estimate from British pounds to US dollars. 

But the "good news" is that I'm not only well over budget, I'm also well behind schedule.  Extra time means extra time to save money towards the build.  So while I'm not thrilled to be over budget, I do at least have the money to spend.  If I had reached this point in the build last fall, I would have had to put the build on hold while I saved up for more materials.

Oh, and that Merton's box showed up yesterday, so I should be able to produce some more construction news shortly.  That's all for now.

Sunday, April 8, 2012

Chine Fillets and Shaping the Ama

Saturday hovered slightly below epoxy-curing temperatures all day, frustratingly.  I'd sworn I would make some progress this weekend. 

You can see how the ama is a little crooked.
I figure the traditional boats made do with what
they had available, and they sailed fine.
Right?  If it doesn't work out, I think I'll probably
just make a foam & fiberglass one for version II.
Well, if you can't work with epoxy, you can at least work on the other parts of the boat, right?  I pulled the ama (outrigger log) out of storage and went after the ends, which I'd done only a little rough shaping on before.  After a bit of work with saw and rasp, I was pretty happy with the shape.


Stern end of the ama is a little fatter than the
bow, because most of the boat's weight will be
carried aft (I think).
  
I pulled out my 1950's-vintage Craftsman belt sander and did a bit of general sanding along the length of the  ama so that it will be ready to paint.  I'd call that effort about half-done; I stopped because the old sander was starting to sound like it needed another overhaul.

Today warmed quickly to around 75 degrees, and I had a fairly open schedule, so I lowered the hull and prepped the chine fillets.  This involved sanding the epoxy-coated plywood I'd be laying the fillets on, hammering the copper stitches down so they wouldn't protrude from the fillets, and masking the entire length of the chines so that I can have a nice clean edge when I'm done. 

I also masked the benches, thinking I might as well fillet them into place while I'm at it.  And I prepared the lashing pads for installation - I forgot to put them on the panels before stitching the hull together.
Chine fillets done.  Note how smooth they are,
compared to the bilge fillet.  Also visible are
the lashing pads (clamped in place) and the
bench fillets.


Finally, I began mixing and applying fillet epoxy.  I've hit on a pretty dependable recipe - 4 pumps each of hardener and resin, then 3 little cat food cans full of microballoons and 3/4 of a can of silica thickener.  The resulting paste is workable, but doesn't sag or flow much at all, a vast improvement over my earlier efforts.

It took 4 batches - 16 pumps in all - to fillet both chines.  Then I changed over to microfiber & epoxy to glue the lashing pads to the hull.  Unfortunately, I grossly overestimated the amount of epoxy needed to do that job, so I was facing the prospect of about two pumps worth of waste.  I hadn't done the benches yet, so I scrambled to mix in the thickener and glass bubbles that would allow that. 
The somewhat gloopy bench fillets.  Since the mix
was so wet, I won't be able to remove the tape
until tonight at the earliest.

Of course, my trusty recipe was off because I was starting with an unknown amount of resin (after applying some to the pads).  So I ended up with a somewhat drippy mix that produced a nice, curved fillet but dripped down the sides a bit.  Cleaned it up with a paper towel as best I could, but I expect there will be some remedial sanding required to fix the drips when it's all cured.

All in all, a very productive weekend.  Looking ahead, there's a bit more filling and sanding to do on the fillets, then I'll be fairing the outside of each, and then (finally) it will be time to fiberglass them.  But I'm almost out of glass balloons, and getting low on epoxy, too.  So I will probably need to place an order for some supplies first.