After yesterday's deck and spar work, I was pretty motivated today. For starters, I trimmed the decks to fit the hull, and sanded them smooth. Then we set sawhorses under the hull and flipped it over, to begin work on the exterior. The goal is to "radius" the seams - that is, to turn them from angular meetings of two sheets of plywood, to gently curved transitions that can be smoothly covered with glass tape.
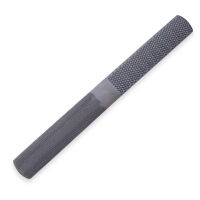
Using my trusty 4-in-hand file, some 60-grit sandpaper, and the block plane, I proceeded to radius the entire length of all three seams in about an hour and a half. It went much faster than anticipated, but I suspect I'm going to be really, really sore tomorrow.
Soon - maybe even later today - I'll make a small batch of filleting epoxy and touch up the gaps in the seams. Then it will be time to glass 'em, and do the final epoxy-coating of the exterior.
Translation: I'm within sight of completing the hull. Emboldened by this realization, I've decided to state publicly that I will launch this boat in June.
There, I said it. And now it remains to be seen whether I can put my money where my mouth is. Stay tuned....
Building (and hopefully sailing) a James Wharram "Melanesia" outrigger sailing canoe on the high plains far inland in the USA.
Showing posts with label epoxy fillets. Show all posts
Monday, May 28, 2012
Tuesday, May 22, 2012
Glass Tape Success
The last time I worked with fiberglass tape on my brother's Bolger Teal build, it was a complete debacle. We ended up with kinked, gappy glass that really wasn't doing the joint any favors; after getting about 20% of the chines done, we abandoned the glass tape all together. So it was with some trepidation that I began taping the fillets on my Melanesia.
Surprisingly, it turned out really well, and I was able to do all three fillets in a single 90-minute session. I was using a cheap disposable paint brush (bristles, not foam) and unadulterated epoxy. Here's the process:
The fillets are smooth curves, and the curve of the chines are smooth as well, so the Melanesia doesn't ask the glass tape to do anything it can't do, and the process is much easier. But I am glad I put in all that work to get the fillets ready. I suspect it would have gone badly if I'd been trying to glass over the undulations and lips they had before the sanding.
When the epoxy is set but not entirely cured, I'll brush another coat or two over it until the weave of the cloth is completely encased. And just like that, the interior fillets will be done.
- Cut a piece of fiberglass tape to the proper length for each section.
- Mix a small batch of epoxy, so it doesn't thicken before you get the chance to use it all.
- Brush epoxy over one section of fillet and the surrounding ply, a little wider than the width of the tape.
- Apply the tape to the fillet. Get the position right, then press the tape into the epoxy.
- Smooth it out with gloved fingers, being careful to press it firmly against the fillet and wet it out thoroughly.
- Brush more epoxy over the cloth until it looks uniformly wet and transparent.
- Repeat for the next section of fillet, mixing more epoxy as necessary.
| The glass will all but disappear when it gets a couple more coats of epoxy over it. |
When the epoxy is set but not entirely cured, I'll brush another coat or two over it until the weave of the cloth is completely encased. And just like that, the interior fillets will be done.
Monday, May 21, 2012
The Joy of Sanding
On the list of books nobody ever wrote, The Joy of Sanding has to be pretty near the top. It's simple drudgery. But if you don't like sanding, you probably shouldn't build a boat, and if you build a boat despite your dislike for sanding, you can't really expect anyone to feel sorry for you.
Power tools make any task go by more quickly, but the odd angles and precision required by sanding the interior fillets on the Melanesia hull just don't work well with any power sander I can think of. So if you're doing all the work, you'll want to make sure you have the right tools for the job.
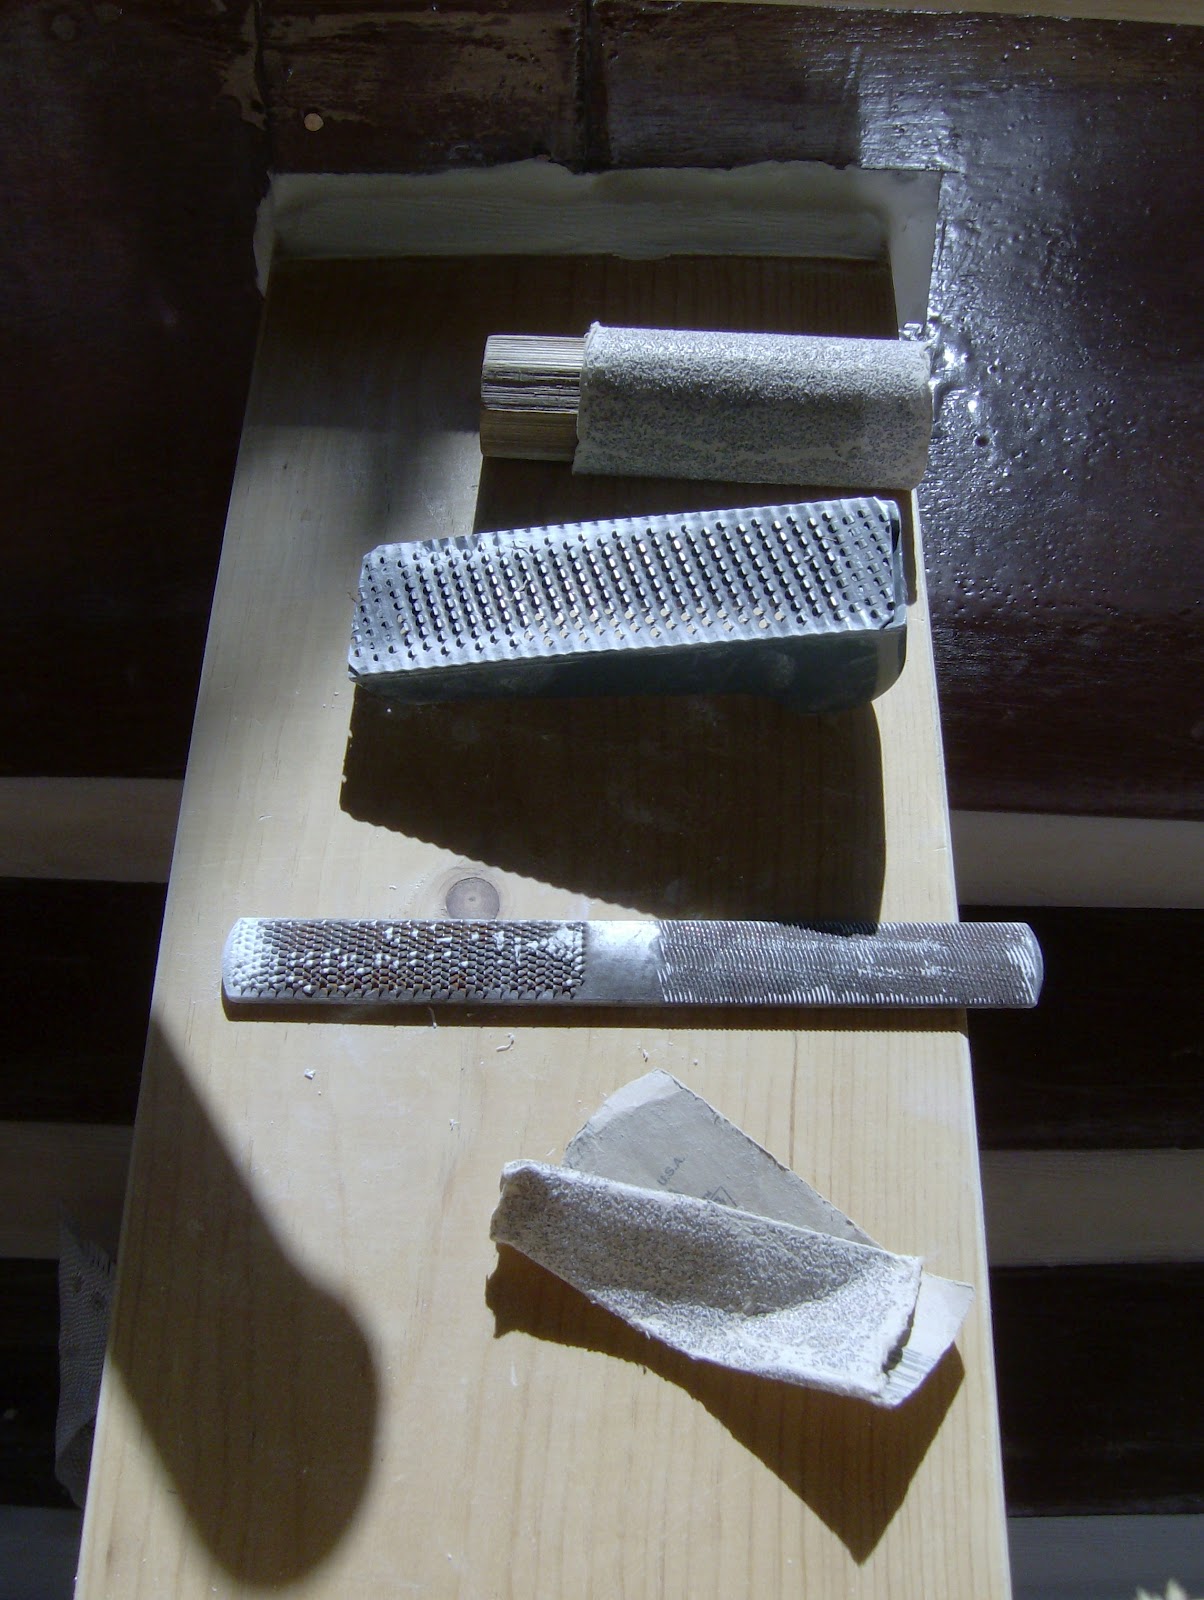
When I stepped onto the porch this morning, I found this unintentional still life on the center thwart. These are the tools I've been using to smooth my fillets, laid out of the way while I vacuumed the dust out of the hull. I've been using these tools:
The point of all this is - of filleting in general, and of sanding the fillets smooth in particular - is to provide a very smooth, gently curved transition from one panel to the other. Well-supported fiberglass tape has excellent tension strength, but if you put a hard corner in it, or leave a gap beneath the tape, you're creating concentration of stresses that will eventually become a point of failure.
The good news is that it's not finish sanding. The epoxy will fill any scratching left behind by the coarse sandpaper or the even coarser rasp.
Anyway, in my own build, I'm almost done sanding and hope to put the first glass tape on today. That's a real milestone, and I'm excited to move beyond the fillets to the next stage of things.
When I stepped onto the porch this morning, I found this unintentional still life on the center thwart. These are the tools I've been using to smooth my fillets, laid out of the way while I vacuumed the dust out of the hull. I've been using these tools:
- coarse (60 grit) sandpaper wrapped around a rough cedar dowel that might end up as a T-handle for one of my paddles, for sanding the curved fillets;
- a SurForm (surface-forming) plane;
- a 4-in-hand rasp that I think I found in the street years ago.
- and a folded scrap of 60 grit sandpaper for the fine work
The point of all this is - of filleting in general, and of sanding the fillets smooth in particular - is to provide a very smooth, gently curved transition from one panel to the other. Well-supported fiberglass tape has excellent tension strength, but if you put a hard corner in it, or leave a gap beneath the tape, you're creating concentration of stresses that will eventually become a point of failure.
The good news is that it's not finish sanding. The epoxy will fill any scratching left behind by the coarse sandpaper or the even coarser rasp.
Anyway, in my own build, I'm almost done sanding and hope to put the first glass tape on today. That's a real milestone, and I'm excited to move beyond the fillets to the next stage of things.
Sunday, April 8, 2012
Chine Fillets and Shaping the Ama
Saturday hovered slightly below epoxy-curing temperatures all day, frustratingly. I'd sworn I would make some progress this weekend.
I pulled out my 1950's-vintage Craftsman belt sander and did a bit of general sanding along the length of the ama so that it will be ready to paint. I'd call that effort about half-done; I stopped because the old sander was starting to sound like it needed another overhaul.
Today warmed quickly to around 75 degrees, and I had a fairly open schedule, so I lowered the hull and prepped the chine fillets. This involved sanding the epoxy-coated plywood I'd be laying the fillets on, hammering the copper stitches down so they wouldn't protrude from the fillets, and masking the entire length of the chines so that I can have a nice clean edge when I'm done.
I also masked the benches, thinking I might as well fillet them into place while I'm at it. And I prepared the lashing pads for installation - I forgot to put them on the panels before stitching the hull together.
Finally, I began mixing and applying fillet epoxy. I've hit on a pretty dependable recipe - 4 pumps each of hardener and resin, then 3 little cat food cans full of microballoons and 3/4 of a can of silica thickener. The resulting paste is workable, but doesn't sag or flow much at all, a vast improvement over my earlier efforts.
It took 4 batches - 16 pumps in all - to fillet both chines. Then I changed over to microfiber & epoxy to glue the lashing pads to the hull. Unfortunately, I grossly overestimated the amount of epoxy needed to do that job, so I was facing the prospect of about two pumps worth of waste. I hadn't done the benches yet, so I scrambled to mix in the thickener and glass bubbles that would allow that.
Of course, my trusty recipe was off because I was starting with an unknown amount of resin (after applying some to the pads). So I ended up with a somewhat drippy mix that produced a nice, curved fillet but dripped down the sides a bit. Cleaned it up with a paper towel as best I could, but I expect there will be some remedial sanding required to fix the drips when it's all cured.
All in all, a very productive weekend. Looking ahead, there's a bit more filling and sanding to do on the fillets, then I'll be fairing the outside of each, and then (finally) it will be time to fiberglass them. But I'm almost out of glass balloons, and getting low on epoxy, too. So I will probably need to place an order for some supplies first.
| Stern end of the ama is a little fatter than the bow, because most of the boat's weight will be carried aft (I think). |
Today warmed quickly to around 75 degrees, and I had a fairly open schedule, so I lowered the hull and prepped the chine fillets. This involved sanding the epoxy-coated plywood I'd be laying the fillets on, hammering the copper stitches down so they wouldn't protrude from the fillets, and masking the entire length of the chines so that I can have a nice clean edge when I'm done.
I also masked the benches, thinking I might as well fillet them into place while I'm at it. And I prepared the lashing pads for installation - I forgot to put them on the panels before stitching the hull together.
| Chine fillets done. Note how smooth they are, compared to the bilge fillet. Also visible are the lashing pads (clamped in place) and the bench fillets. |
Finally, I began mixing and applying fillet epoxy. I've hit on a pretty dependable recipe - 4 pumps each of hardener and resin, then 3 little cat food cans full of microballoons and 3/4 of a can of silica thickener. The resulting paste is workable, but doesn't sag or flow much at all, a vast improvement over my earlier efforts.
It took 4 batches - 16 pumps in all - to fillet both chines. Then I changed over to microfiber & epoxy to glue the lashing pads to the hull. Unfortunately, I grossly overestimated the amount of epoxy needed to do that job, so I was facing the prospect of about two pumps worth of waste. I hadn't done the benches yet, so I scrambled to mix in the thickener and glass bubbles that would allow that.
| The somewhat gloopy bench fillets. Since the mix was so wet, I won't be able to remove the tape until tonight at the earliest. |
Of course, my trusty recipe was off because I was starting with an unknown amount of resin (after applying some to the pads). So I ended up with a somewhat drippy mix that produced a nice, curved fillet but dripped down the sides a bit. Cleaned it up with a paper towel as best I could, but I expect there will be some remedial sanding required to fix the drips when it's all cured.
All in all, a very productive weekend. Looking ahead, there's a bit more filling and sanding to do on the fillets, then I'll be fairing the outside of each, and then (finally) it will be time to fiberglass them. But I'm almost out of glass balloons, and getting low on epoxy, too. So I will probably need to place an order for some supplies first.
Monday, March 26, 2012
Bilge Fillet Complete-ish
Nice weekend weather gave me a window of opportunity to finish up the center seam on my canoe. I remembered to use the tape trick this time, and the line came out nice and clean (except for the horrors of the frame fillets). Considering that I don't intend to paint the interior, I think I can live with the result.
The reason I describe it as "complete-ish" rather than "complete" is that there's a sanding and fiberglass taping step still to do. One smooths the top of the fillet out into a graceful curve, then epoxy and glass tape are applied to protect and strengthen the joint. Combined with the filler and glass tape on the exterior side of the joint, the result is sort of an I-beam structure that gradually blends into the plywood.
Also, there's a bit of remedial filleting to do before we can glass over it. Towards the bow, my mixture was a little thin and didn't fill as high as the wire stitches, as you can see in the second photo here. The glass tape really needs to have a smooth surface to sit on, or else you get bubbles of air beneath it. So I'll have to fill that in a little, too.
But I think I'll fillet the chines and the outsides of the joints first - that way, I can do my glassing all at once. Hopefully, that will give me a chance to get "good at it" and produce a better result.
The weather man says that our unseasonably warm temperatures will continue for most of this week, so there should be some good opportunities for filleting in the early evenings. More news as it happens....
The reason I describe it as "complete-ish" rather than "complete" is that there's a sanding and fiberglass taping step still to do. One smooths the top of the fillet out into a graceful curve, then epoxy and glass tape are applied to protect and strengthen the joint. Combined with the filler and glass tape on the exterior side of the joint, the result is sort of an I-beam structure that gradually blends into the plywood.
Also, there's a bit of remedial filleting to do before we can glass over it. Towards the bow, my mixture was a little thin and didn't fill as high as the wire stitches, as you can see in the second photo here. The glass tape really needs to have a smooth surface to sit on, or else you get bubbles of air beneath it. So I'll have to fill that in a little, too.
But I think I'll fillet the chines and the outsides of the joints first - that way, I can do my glassing all at once. Hopefully, that will give me a chance to get "good at it" and produce a better result.
The weather man says that our unseasonably warm temperatures will continue for most of this week, so there should be some good opportunities for filleting in the early evenings. More news as it happens....
Friday, March 23, 2012
<SARCASM>Oh, How I've Missed This</SARCASM>
It's been a really, really long time since I had anything to report on the boat building front. I let a week of warm temperatures slip by without resuming the project, because I was finishing up a car project (not a Land Rover, but sort of close: a 1987 4Runner) during that time. But the 4Runner is finally sorted & registered, and I seem to recall stating a spring 2012 launch goal for this canoe, so when the temperatures rose to epoxy-curing levels again, I knew it was time to put the excuses aside and get to work.
I lowered the hull, swept and vacuumed the dust out of it, and mixed a big batch of thick fillet epoxy to do the semi-vertical stern joint with. Found that a cat had urinated in the boatbuilding supplies box, right on my dust mask, so I had to mix without a mask.... Had a little trouble getting the mixed epoxy into my ad-hoc applicator system (the Ziploc bag with a corner cut off).... Accidentally spilled epoxy on my table saw table.... And proceeded to make a fair mess of the work, to boot.
When the spills were cleaned up, and all the epoxy had been coaxed into its rightful place (more or less), I straightened up and surveyed the carnage. To be fair, the stern looks better than the bow, really, and both of these places will be covered by the decks when the boat is done, so I should stop complaining. Despite the hassle of filleting, it really is good to be back at work on this project. As long as the weather holds, I'll be working to meet that launch goal, and I'll keep you posted.
I lowered the hull, swept and vacuumed the dust out of it, and mixed a big batch of thick fillet epoxy to do the semi-vertical stern joint with. Found that a cat had urinated in the boatbuilding supplies box, right on my dust mask, so I had to mix without a mask.... Had a little trouble getting the mixed epoxy into my ad-hoc applicator system (the Ziploc bag with a corner cut off).... Accidentally spilled epoxy on my table saw table.... And proceeded to make a fair mess of the work, to boot.
When the spills were cleaned up, and all the epoxy had been coaxed into its rightful place (more or less), I straightened up and surveyed the carnage. To be fair, the stern looks better than the bow, really, and both of these places will be covered by the decks when the boat is done, so I should stop complaining. Despite the hassle of filleting, it really is good to be back at work on this project. As long as the weather holds, I'll be working to meet that launch goal, and I'll keep you posted.
Sunday, October 16, 2011
Epoxy Fillets 2, Rich 1
I've been avoiding the epoxy work on the boat lately, to be honest. It's much less glamorous than lofting, cutting or stitching. Worse still, it's messy and difficult to do well, and the prep involves sanding, which I don't like much. But my collection of plywood parts won't be a boat until I fillet every seam on the thing.
So I finally got a little time and a little gumption together, and filleted another bead along the center seam. It went much better today - so much so that I'm willing to claim victory over the dreaded epoxy fillet in this encounter. I think part of the reason was that I'm working in a more open section of the boat, where it was much easier to apply and work the epoxy. But it also helped a lot that I mixed a stiff batch of epoxy today, so there was no dripping and relatively little flowing or pooling to mess up my efforts. I'm starting to get a good feel for what the consistency should be, finally.
The epoxy cures noticeably slower in these cool fall temperatures - today's working temp was around 60 degrees F. I'll pull the masking tape edging up tomorrow morning or so, and if I get favorable weather I'll continue the center seam to the stern post.
Looking ahead, there's still the tight detail work around the stern post to do, and then I'll need to fillet the side panel seams. So with today's work, I'm something like a fifth or a sixth of the way through the filleting process. And after that's done, there's fiberglass tape for the inside and outside of every fillet, and then fairing the hull smooth.... Much to be done, in short, but it feels good to make some progress and get a better result than my last few attempts.
So I finally got a little time and a little gumption together, and filleted another bead along the center seam. It went much better today - so much so that I'm willing to claim victory over the dreaded epoxy fillet in this encounter. I think part of the reason was that I'm working in a more open section of the boat, where it was much easier to apply and work the epoxy. But it also helped a lot that I mixed a stiff batch of epoxy today, so there was no dripping and relatively little flowing or pooling to mess up my efforts. I'm starting to get a good feel for what the consistency should be, finally.
The epoxy cures noticeably slower in these cool fall temperatures - today's working temp was around 60 degrees F. I'll pull the masking tape edging up tomorrow morning or so, and if I get favorable weather I'll continue the center seam to the stern post.
Looking ahead, there's still the tight detail work around the stern post to do, and then I'll need to fillet the side panel seams. So with today's work, I'm something like a fifth or a sixth of the way through the filleting process. And after that's done, there's fiberglass tape for the inside and outside of every fillet, and then fairing the hull smooth.... Much to be done, in short, but it feels good to make some progress and get a better result than my last few attempts.
Sunday, October 2, 2011
Epoxy Fillets 2, Rich 0
My second attempt at filleting the bow went a little better. I made a stiffer mix this time (less like Dairy Queen soft-serve and more like regular ice cream). It was more workable, and I hit on a pretty handy way to apply it in tight spaces: put epoxy mix in a zip-log bag, snip off a corner, and use it like a pastry chef's icing bag to squeeze the epoxy into spaces you can't reach with regular tools.
However, it didn't all go my way. After filleting the forward third of the bilge to the proper radius, I cleaned up and went to work. When I got home in the evening, I found that the epoxy had flowed downhill and pooled in the bow. I now have the world's thickest fillet at the bow. In the photo at right, you can see how the areas in the foreground were, at one time, covered with whitish epoxy -- but it has all flowed down to the end of the hull, where it's pooled much deeper than necessary.
One other minor victory: note the clean edges on my fillets at right. This is due to my friend Steve's masking tape technique, which really does produce a cleaner result than the alternative. But overall, I have to say that epoxy filleting is my least favorite part of the whole process so far.
Finally, I picked up a cheap nylon windbreaker at the thrift store the other day, and from it cut out the Wharram insignia and sail numbers that will eventually go on my sail, once the sail is sewn together. The sail number is the number of my plan set; the logo and number together uniquely identify my boat.
I think it looks pretty sharp. My wife is not fond of the Wharram logo, as she feels that it looks like a pair of breasts. She's right, it does -- once somebody points it out to you -- and I'm pretty sure the resemblance not accidental, as it was supposedly taken from some prehistoric goddess emblem. But while I wouldn't sew mudflap girls or a Playboy bunny logo onto my sail, I don't think the resemblance is enough to justify keeping the designer's logo off the sail. I'm proud that my boat is a Wharram, and I want people to know. So the logo stays, and if anyone asks, I'll tell them what I just wrote.
However, it didn't all go my way. After filleting the forward third of the bilge to the proper radius, I cleaned up and went to work. When I got home in the evening, I found that the epoxy had flowed downhill and pooled in the bow. I now have the world's thickest fillet at the bow. In the photo at right, you can see how the areas in the foreground were, at one time, covered with whitish epoxy -- but it has all flowed down to the end of the hull, where it's pooled much deeper than necessary.
One other minor victory: note the clean edges on my fillets at right. This is due to my friend Steve's masking tape technique, which really does produce a cleaner result than the alternative. But overall, I have to say that epoxy filleting is my least favorite part of the whole process so far.
Finally, I picked up a cheap nylon windbreaker at the thrift store the other day, and from it cut out the Wharram insignia and sail numbers that will eventually go on my sail, once the sail is sewn together. The sail number is the number of my plan set; the logo and number together uniquely identify my boat.
I think it looks pretty sharp. My wife is not fond of the Wharram logo, as she feels that it looks like a pair of breasts. She's right, it does -- once somebody points it out to you -- and I'm pretty sure the resemblance not accidental, as it was supposedly taken from some prehistoric goddess emblem. But while I wouldn't sew mudflap girls or a Playboy bunny logo onto my sail, I don't think the resemblance is enough to justify keeping the designer's logo off the sail. I'm proud that my boat is a Wharram, and I want people to know. So the logo stays, and if anyone asks, I'll tell them what I just wrote.
Tuesday, September 27, 2011
Filleting, Part 1 (or, "Dairy Queen Owes Me Big-Time")
I tried laying epoxy fillets along the stem post today. It's my first-ever experience with filleting, and I was really trying for a strong start. There are gaps between the panels, so I covered them with masking tape to keep the epoxy from falling through. And a friend suggested using tape to simplify clean-up after the fillet's applied, so I surrounded the fillet area with more tape.
Then it was on to the instructions. The epoxy here is not the pure, transparent fluid I've been coating panels with; here, it should be thickened with silica powder and miniscule glass bubbles. Wharram recommends a consistency like "soft ice cream." Being American, I instantly thought "Dairy Queen" and went with it. What a hassle! You can't manipulate something like that, you can only pour it. I poured, trying to get it to flow along the seam. When it ran down the stem post to the bilge, I tried my hand at pushing a liquid uphill with a plastic knife.
As I fought that hopeless battle, it gradually became clear to me that my boat was leaking. White fluid was dripping out the edges of the masking tape and pooling below. I tried briefly to contain that mess, but soon realized there would be no Containment, the best I could hope for was Spill Mitigation.
Fortunately, I had had the foresight to lay plastic sheeting below my work. Unfortunately, that had happened in a parallel universe inhabited by a slightly smarter version of me. Here in this universe, there was no protective sheeting, only a growing puddle of epoxy directly on the concrete floor of our porch. I wiped up the mess with some paper towels, grabbed some plastic, and spread it under the leaking hull.
I then quickly mixed up another, smaller, much stiffer batch of epoxy and stirred it into the dwindling puddle of fluid in the bilge. The result was a slightly more workable substance that I managed to push into some of the nooks and crannies of the bow. Finally, I had done the best I could with what I had to work with, and cleaned up. The score was clearly Epoxy Fillets 1, Rich 0.
Looking back on the debacle, it occurs to me that they may not have Dairy Queen in the UK. Their standards of what constitutes "soft ice cream" would therefore be vastly different from my own. Next time, I will try to use a firmer mix, and will post the story of the rematch here.
As I fought that hopeless battle, it gradually became clear to me that my boat was leaking. White fluid was dripping out the edges of the masking tape and pooling below. I tried briefly to contain that mess, but soon realized there would be no Containment, the best I could hope for was Spill Mitigation.
Fortunately, I had had the foresight to lay plastic sheeting below my work. Unfortunately, that had happened in a parallel universe inhabited by a slightly smarter version of me. Here in this universe, there was no protective sheeting, only a growing puddle of epoxy directly on the concrete floor of our porch. I wiped up the mess with some paper towels, grabbed some plastic, and spread it under the leaking hull.
I then quickly mixed up another, smaller, much stiffer batch of epoxy and stirred it into the dwindling puddle of fluid in the bilge. The result was a slightly more workable substance that I managed to push into some of the nooks and crannies of the bow. Finally, I had done the best I could with what I had to work with, and cleaned up. The score was clearly Epoxy Fillets 1, Rich 0.
Looking back on the debacle, it occurs to me that they may not have Dairy Queen in the UK. Their standards of what constitutes "soft ice cream" would therefore be vastly different from my own. Next time, I will try to use a firmer mix, and will post the story of the rematch here.
Subscribe to:
Posts (Atom)