Wednesday, July 31, 2013

Not Dead, But Somewhat Dismayed

One Year Post-Launch

Apologies to my loyal reader for the cliffhanger.  I am alive; the boat didn't sink, or break up, or otherwise fail completely.  I christened her Ihi, which I'm told means "power" or "respect" depending on whether you're speaking Maori or Hawai'ian.  I think the fact that this sort of craft is responsible for etymological similarities that span over 3500 nautical miles of nearly empty ocean is pretty deserving of respect.  I also wanted the name to indicate a respect for the power of the ocean, which is an integral part of Polynesian culture and traditional seamanship.

So yeah, we poured a bit of champagne over the bow and said a few words and launched without incident.

But I have had a lot of trouble with her.  That trouble, and my confusion as to its cause (and of course life getting in the way) is the reason I've been silent so long.

The Problem: Steering


Paddling, Ihi is a bit slower than a non-outrigger canoe.  She'd get there, but she's way slower than, say, a competently handled sea kayak.

Under sail in a stiff breeze, Ihi goes like a bat out of hell.  It's thrilling.

Unfortunately, in either case she seems to go pretty well wherever she pleases, with little regard for helm input.  In Colorado's smallish inland lakes, this results in a lot of brief, terrifying, frustrating darts from launch to the shore.  I never quite ran into anything, or ran aground even, but wow, I had some close calls.

Initial Theory: Hull Twist?


One reason I have been so quiet about my experiences is that I was initially convinced that the pull was always to port, and indicated that I'd built  a badly twisted hull.  There is some hull twist visible in her - I was hasty installing the aft thwart one day, with a bunch of epoxy curing before I could line things up right.  You can see it in this older photo from her build:

It is my intellectual style to ponder a problem quietly for a long time, until I have a plan.  Well, I spent much of the past year wondering if I would have to grind out all of her fillets and rebuild her completely.

This week, I launched Ihi for the first time this summer (shameful, I know), and I rigged her with the ama to starboard rather than to port for the first time ever.  And guess what?  She didn't pull to port anymore (paddling - I haven't gotten her sail up yet this year, due to a spar failure).

Well, that's not entirely true. She veers badly off the wind, whether it's coming from port or starboard.  I think she's misbehaving because she would prefer to be steered with the steering paddle while being paddled along - or because she needs ballast in the forefoot to keep her tracking straight.  I need to find some other Melanesia owners to talk to about this behavior.

It's entirely possible that the twist is a real thing, but my latest thinking on the issue is that it's likely nowhere near as big an effect as the tug of the ama in the water.  Which brings me to my second theory:

Second Theory: Poor Ama Performance?

I built two amas for Ihi.  My first was an undersized aspen trunk, and it's probably only about 60% the volume (and thus buoyancy) it's supposed to be.  It digs in pretty badly, and that can't be good for tracking.  Ihi definitely takes a little muscle to overcome the drag of the submarining ama.

My second ama, which is made from arid mountain pine, is at least twice as dense as the aspen.  It's plenty big, but not the right stuff to make an ama out of.  It barely floats by itself, so it's not able to lend the canoe much help.  And it's so massive that you can feel any acceleration vector averaging against the inertia of the ama, as if it were a giant sea anchor.  The small aspen ama is usable, at least; the heavy pine version is a definite mistake.

I'd like to find another, larger aspen trunk and try to fashion a larger ama that has that magically low density of aspen.  Failing that, I've considered a glass & foam ama, but that's going to be very expensive and time consuming.  I'm more likely to build one out of foam and construction lumber than to go the superlight glass/foam route.  Until I get a new and improved ama of some sort, I won't be able to speak authoritatively on whether the ama is/was a contributing factor.

Third Theory: Untrained Helmsman

One thing I know for certain: Ihi steers unlike anything I've ever sailed before.  She's frightfully sensitive to weight distribution, and her handling characteristics change dramatically with the wind speed.  In the trade winds of the South Pacific, that's probably not a big deal, but here in the capricious, swirling winds of Colorado's Front Range, it's mystifying.  I'm reminded of Larry Niven and Jerry Pournelle's line about juggling in variable gravity.

The only answer here is experience.  I need to keep sailing her so that I can begin to understand how to sail her.  As time goes on, I'm sure there will be fewer and fewer near-calamities.  Who knows?  Maybe I'll eventually get good enough to take her out in some real water, like coastal cruising or that Watertribe North Carolina race I had my eye on.  Ten years ought to do it.... Watertribe 2023, here I come!

Fourth Theory: Poor Sail Trim Capability

I'm certain about this one, too.  As outlined in this post on sail handling the Melanesia, it's critical to be able to adjust the mast's tilt fore and aft, and port and starboard.  The fore-and-aft tilt affects whether she steers neutrally as load changes, and the lateral adjustment is necessary to correct for weather helm.

Well, I initially intended to achieve these adjustments using homemade deadeyes and toggles:
The problem is, there's just too much friction in the deadeyes.  There was no way to adjust the mast position with the sail under load - it wasn't even possible to adjust with the sail luffing, unless I had a helper guide the mast into position by hand.  In the end, every adjustment required returning to the beach, which isn't easy when you don't have helm control to begin with.  I kept having to drop the sail and paddle back to my launch site to try again.  You just can't squeeze very many iterations of that process into an afternoon sail.

To that end, I've purchased a handful of small Harken blocks to replace the deadeyes.  These should allow much more real-time adjustment capability, which will, in turn, give me the equivalent of several month's experience in just a few outings.

Other Things

Let's see, what else have I learned?  Not as much as I would have if I'd been sailing more, but there are a few lessons I can think of:
  1. The Melanesia has really low freeboard.  She a wet boat when even my overloaded El Toro dinghy would be dry.  Though this would probably improve a little with a more buoyant ama, it's hard to imagine her working in the open ocean. I'd really want to build some bulkheads beneath the fore and aft decks for guaranteed flotation if I were going to try her in those conditions.
  2. The pinned and lashed connections between the jaws and the spars doesn't seem to work for me.  Maybe I don't have the joinery skills, or maybe I'm using poor materials, or poor lashing execution.  Whatever the case, I'll take an epoxy & glass tape joint any day.  I hear of a new local source for bamboo - maybe I'll end up with a second bamboo spar soon, who knows?
  3. Assembling Ihi takes a lot of time.  Even if I leave the tukis in the ama and lashed to each other where they cross, I still have 9 major lashings to complete every time I transport the boat.  In my experience, it takes me (by myself) about an hour and a quarter to get everything set up.  She's not a great boat to use in situations where you have to cart her to and fro - though she's very portable once she's disassembled. 
That's all I can think of for now.  I'm not sure how often I'll be posting in the future, but I'll try to report back as I resolve the issues I'm facing.  Questions or suggestions from fellow Melanesia sailors welcome!

Saturday, June 30, 2012

Launch Day: Prelude

The day is upon us!  The boat is ready, more or less.  Cosmetically, it's unfinished - weather has prevented me from painting the stripe I want it to have, and the interior could use another coat of the base color.

But all of the major questions are answered.  I'm halfway through lashing her all together and rigging in the back yard to ensure there aren't any unforeseen problems before I transport it to the local state park where we'll launch.  I did have to re-drill a couple of the tuki holes in the ama, as they weren't lining up right.  And the fancy windsurfer mast turns out to be too stiff for the crabclaw :( But I had a backup.

Anyway, I'll post a wrap-up here later in the weekend.  There's work to be done!

Tuesday, June 26, 2012

Much to tell, no time to tell it

Apologies for announcing I would launch soon, then disappearing.  I am indeed on track to launch in June, but just barely:  I've declared a launch party on the 30th, at our local state park lake.  There's a lot to be done to meet that deadline, but it should be doable, if only just. 

Since the beginning of the month, I've:
  • completed glassing and epoxy coating the exterior seams
  • faired the bow and stern
  • applied 3 coats of yellow paint
  • built and installed a "Y" mount for my reclaimed windsurfer mast
  • cut a new "Y" for my bamboo spar
  • purchased, shaped and painted a pine log to use for the outrigger
  • trimmed my crossbeams to shape
  • cut all the little crossbeam support sticks ("tuki") 
  • and applied a coat of varnish to the paddles
Still to do before launch in 4 days:
  • purchase, cut, splice and install all rigging
  • paint the stripe along the gunwales
  •  stitch the sail numbers onto the sail
  • finish varnishing paddles
  • test-assemble the boat in the back yard so that I know what I'm doing
  • and apply for state registration, which is required of sailboats
 Now, if you'll excuse me, I need to get going - there's a lot of work to do yet!

Monday, May 28, 2012

A Declaration

After yesterday's deck and spar work, I was pretty motivated today.  For starters, I trimmed the decks to fit the hull, and sanded them smooth.  Then we set sawhorses under the hull and flipped it over, to begin work on the exterior. The goal is to "radius" the seams - that is, to turn them from angular meetings of two sheets of plywood, to gently curved transitions that can be smoothly covered with glass tape.

Using my trusty 4-in-hand file, some 60-grit sandpaper, and the block plane, I proceeded to radius the entire length of all three seams in about an hour and a half.  It went much faster than anticipated, but I suspect I'm going to be really, really sore tomorrow.

Soon - maybe even later today - I'll make a small batch of filleting epoxy and touch up the gaps in the seams.  Then it will be time to glass 'em, and do the final epoxy-coating of the exterior.

Translation:  I'm within sight of completing the hull.  Emboldened by this realization, I've decided to state publicly that I will launch this boat in June. 

There, I said it.  And now it remains to be seen whether I can put my money where my mouth is.  Stay tuned....

Sunday, May 27, 2012

Decks On! And Sail Test-Fit to Spars

With a bit of time this morning, I glued and nailed the fore & aft decks onto the hull.  This is another milestone moment, at it indicates we're pretty much done with the right-side-up segment of the build. 

The decks were cut pretty accurately to the plan dimensions.  Installed, they overhang the sheer a little, which indicates that either they weren't cut as accurately as I thought, or the hull is slightly narrower than it should be.  Either way, we're talking about a relatively small discrepancy, so I won't worry about it.  I'll just cut/sand the overhang off, and nobody will ever know.
I mixed up way more epoxy/fiberglass powder glue than I needed, so after I was done nailing down the decks, I stirred some silica powder into the remaining epoxy and used it as a fairing compound to fill gaps and smooth lines around the handles and deck beams. 

Next up for the hull: we'll pull it out of the porch, invert it on saw horses, and radius the chines in preparation for the exterior glass tape.  When that step is done, it will be time for a final coat of epoxy, then paint!  

The other big news is that I scored a twelve-foot length of bamboo at the second-hand building materials shop yesterday.  Cost me all of $3.22, which is less than a tenth of what it would  elsewhere.  It's too thin to use as anything but a spar, and may not be stout enough for that, even.  But it's a thick-walled variety, and seems quite strong.  So I'm going to try it.  If it breaks in use, we'll just replace it with something else.

I fitted it to a crotch I'd cut earlier, and pinned and lashed them as per the plans.  I must say, I'm a bit nervous about that joint.  But Wharram says it will hold, so who am I to argue?

With two spars ready, and the sail more or less complete, I couldn't help arranging it in the back yard to see how it looks.  With Puff the cat supervising, I laced the sail onto the spars until I ran out of line about 3/5ths of the way around.  It looks handsome, but I must confess that my new bamboo spar may be about 6" too short. 

As disappointing as that is, I can still use it as part of my hiking platform.  It certainly won't be wasted.  But that means I need to figure out how to fit a Y-joint to the carbon fiber windsurfer mast.  I might end up using store-bought lumber to make that piece, as I can't imagine turning a chunk of found lumber into the perfectly round 1.75" dowel required to fit the inside of the mast.

Friday, May 25, 2012

Another Wharram Melanesia Build: Photos From New Caledonia

I had a brief exchange with Jean-Philippe, the builder of the Melanesia featured in the most recent video, and he pointed me towards a photo set of his build and finished boat, Du Ami.  The photos are on his Facebook page. One might need a Facebook account to view them, I'm not sure.

As you can see, he's done a great job.  Highlights include real mylar sailcloth, bamboo spars & poles, and a sensible paint job to minimize brightwork and the associated maintenance headaches.

Note the clean fillets on this frame.  Jean-Philippe's handiwork seems to have generally been more competent than my blundering - perhaps he's done this before?  Or maybe he's just a really quick learner.
On the left beside the hull here, you can see his ama, which he laminated from store-bought lumber.  It's so much straighter than my tree trunk....  I also see that he enclosed his bow and stern with bulkheads to create buoyancy/storage compartments.  I'd really like to do that to my Melanesia, but I haven't yet decided if it's worth the extra effort....  It sure looks good, though.

Oh, and the result?  I'll let him speak for himself here, describing the shakedown cruise in one of the photo comments:
It sails pretty well we can sail near the wind, we can tack and jybe. We had a peak speed of 5,7 kts with 10 kts of wind (13kts in gusts). Really happy for a first ride.

Anyway, great work, Jean Philippe!  I would be thrilled to achieve such a result in my build.

Thursday, May 24, 2012

A New Wharram Melanesia Video on Youtube


We've seen just a little bit of JIPE98's Melanesia before, but he's really cooking in this one.  The blurb beneath the video states that he hit 8.4 knots on this run from Ouemo to Uere, New Caledonia.  That's really cooking for a 16' outrigger canoe!

The video appears to have been shot handheld by his crew, and details of his one-handed steering setup hover just outside the frame.  But there are some stills of the canoe from above at the end of the video, and she's a very nice-looking example.

I look forward to seeing more of this Melanesia in the future.  It looks like he's got a great boat, and a beautiful setting to sail in.


Meanwhile, in my own build, I wasn't able to apply further coats of epoxy to my fiberglass-taped fillets yesterday because a cold front blew through, bringing 50°F temps and a day of much-needed rain.  So I continued stitching the second rope to my sail, which is almost complete now.  Today looks favorable for epoxy work - higher temperatures, at least, and the rain has ended.  So I hope to be able to finish coating the fillet glass today, and move on to installing the decks tomorrow.

Tuesday, May 22, 2012

Glass Tape Success

The last time I worked with fiberglass tape on my brother's Bolger Teal build, it was a complete debacle.  We ended up with kinked, gappy glass that really wasn't doing the joint any favors; after getting about 20% of the chines done, we abandoned the glass tape all together.  So it was with some trepidation that I began taping the fillets on my Melanesia.

Surprisingly, it turned out really well, and I was able to do all three fillets in a single 90-minute session.  I was using a cheap disposable paint brush (bristles, not foam) and unadulterated epoxy.  Here's the process:
  • Cut a piece of fiberglass tape to the proper length for each section.
  • Mix a small batch of epoxy, so it doesn't thicken before you get the chance to use it all.  
  • Brush epoxy over one section of fillet and the surrounding ply, a little wider than the width of the tape.
  • Apply the tape to the fillet.  Get the position right, then press the tape into the epoxy.  
  • Smooth it out with gloved fingers, being careful to press it firmly against the fillet and wet it out thoroughly.
  • Brush more epoxy over the cloth until it looks uniformly wet and transparent.
  • Repeat for the next section of fillet, mixing more epoxy as necessary.
Looking back at our bad experience on the Teal, I think the difference lies in the smooth fillets.  We were trying to glass a sharp corner on a curved line, and the glass just didn't like taking that shape.  It was like folding paper - you can bend paper, and you can crease it, but you can't bend creased paper.  So the glass wrinkled. 

The glass will all but disappear when it gets
a couple more coats of epoxy over it.
The fillets are smooth curves, and the curve of the chines are smooth as well, so the Melanesia doesn't ask the glass tape to do anything it can't do, and the process is much easier.  But I am glad I put in all that work to get the fillets ready.  I suspect it would have gone badly if I'd been trying to glass over the undulations and lips they had before the sanding.

When the epoxy is set but not entirely cured, I'll brush another coat or two over it until the weave of the cloth is completely encased.  And just like that, the interior fillets will be done.

Monday, May 21, 2012

The Joy of Sanding

On the list of books nobody ever wrote, The Joy of Sanding has to be pretty near the top.  It's simple drudgery.  But if you don't like sanding, you probably shouldn't build a boat, and if you build a boat despite your dislike for sanding, you can't really expect anyone to feel sorry for you. 

Power tools make any task go by more quickly, but the odd angles and precision required by sanding the interior fillets on the Melanesia hull just don't work well with any power sander I can think of.  So if you're doing all the work, you'll want to make sure you have the right tools for the job.

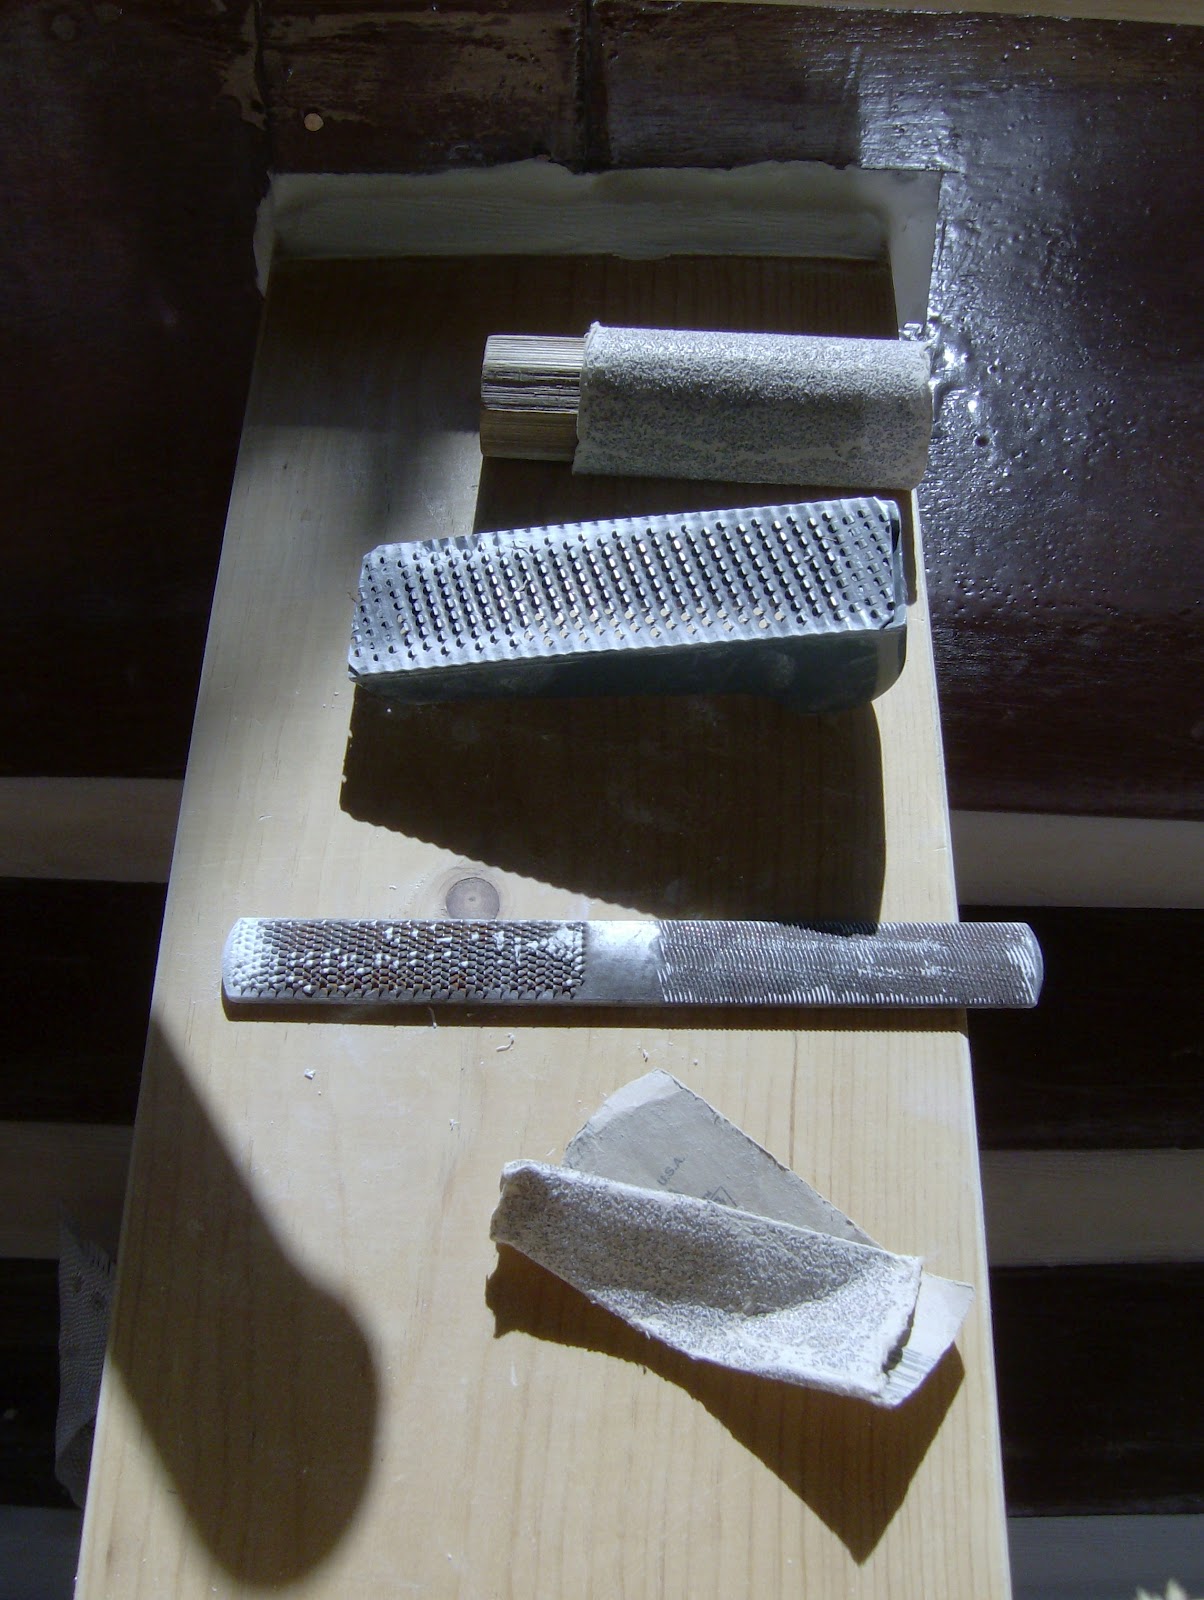
When I stepped onto the porch this morning, I found this unintentional still life on the center thwart.  These are the tools I've been using to smooth my fillets, laid out of the way while I vacuumed the dust out of the hull.  I've been using these tools:
  • coarse (60 grit) sandpaper wrapped around a rough cedar dowel that might end up as a T-handle for one of my paddles, for sanding the curved fillets;
  • a SurForm (surface-forming) plane;
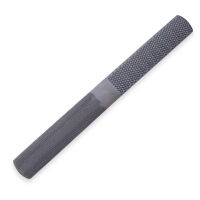
  • a 4-in-hand rasp that I think I found in the street years ago.
  • and a folded scrap of 60 grit sandpaper for the fine work
Of these, the 4-in-hand rasp has been the most useful.  It's great for knocking down high spots, and I've found that it chews up the fluffy fillet epoxy nicely, but doesn't really dig into the pure epoxy coating on the wood, so it's great for smoothing down the raised edges of the fillets where I peeled back the masking tape.

The point of all this is - of filleting in general, and of sanding the fillets smooth in particular - is to provide a very smooth, gently curved transition from one panel to the other.  Well-supported fiberglass tape has excellent tension strength, but if you put a hard corner in it, or leave a gap beneath the tape, you're creating concentration of stresses that will eventually become a point of failure.

The good news is that it's not finish sanding.  The epoxy will fill any scratching left behind by the coarse sandpaper or the even coarser rasp. 

Anyway, in my own build, I'm almost done sanding and hope to put the first glass tape on today.  That's a real milestone, and I'm excited to move beyond the fillets to the next stage of things.

Friday, May 11, 2012

Sail Progress: Bolt Rope Installed

With some weird late-winter weather interrupting our early summer, I've been able to spend some time sewing the bolt rope into the edge of my sail without feeling guilty: surely you don't expect me to work on the hull when it's 43°F and raining?!?

The bolt rope is an actual rope sewn into a hem along the edge of the sail.  It provides a simple way to reinforce the edge so that stresses are well-distributed without a complicated seam.

Tonight, I put the finishing stitches in.  For those of you keeping track at home, that's about 26' of hand-stitching. Sewing is not my strong suit, so it was tough work.  I actually missed the infernal device!  But the sail really looks like a sail now.

There's still more rope to sew on, but that goes outside the hem, and is merely sewn/lashed to the interior bolt rope at 6" intervals.  I suspect it will be quicker work.  Before I can do it, though, I'll need to buy some line at the local hardware store. I don't have enough of the used polypro rope I pulled out of a trash can to complete the job.

I'll try to pick up that line, and maybe some sandpaper, tomorrow. And if this weather holds, I might just pull out the infernal device again to sew on my sail numbers and Wharram insignia, too.

Wednesday, May 9, 2012

More Sailmaking

For some reason, I'm loathe to break out the sandpaper and finish the fillets in my hull.  But time's a-wasting, so I need to make some sort of progress on the boat.

There's still the sail to work on, so this morning my son and I broke out the infernal device the sewing machine.  We retouched some segments of the center seam that were sloppy or crooked, or where the machine skipped stitches.

Then we got out the batten, and sketched in the hollow in the leach (mouth?) of the sail.  I triple-checked to ensure that it really was cut that way, and not just shown curved in the drawings because that's how it looks when you're sailing.  But no, I'm pretty sure that's actually how it should be cut.

So we sketched and cut the hollow, then hemmed it to a length of polypropylene webbing.  It looks much more like a crab claw sail with that curve in place.

The next step will be to hand-stitch the bolt ropes into the seam along the head and foot of the sail, and again outside the seam.  That rope will be used as eyelets when we lace the sail to the spars.

Speaking of spars, I picked up three impressive lengths of straight, dead aspen at a friend's cabin last weekend.  I haven't decided yet if they're to be spars or kiato, or some of each.  But they represent some more non-hull progress.  So even though I'm avoiding the fillets, I'm still moving the project forward.

Tuesday, May 1, 2012

Budget Update

I mentioned recently that I was out of glass bubbles (an important filleting additive) and getting low on epoxy.  So I've placed another order with Merton's, to the tune of $67.24.  This brings the epoxy lineitem in my budget up to $243.76, and the total cost thus far to $595.89. 

For those of you keeping score at home, that's around $150, or roughly 33%, over the initial budget estimate, which I arrived at by converting Wharram's budget estimate from British pounds to US dollars. 

But the "good news" is that I'm not only well over budget, I'm also well behind schedule.  Extra time means extra time to save money towards the build.  So while I'm not thrilled to be over budget, I do at least have the money to spend.  If I had reached this point in the build last fall, I would have had to put the build on hold while I saved up for more materials.

Oh, and that Merton's box showed up yesterday, so I should be able to produce some more construction news shortly.  That's all for now.

Sunday, April 8, 2012

Chine Fillets and Shaping the Ama

Saturday hovered slightly below epoxy-curing temperatures all day, frustratingly.  I'd sworn I would make some progress this weekend. 

You can see how the ama is a little crooked.
I figure the traditional boats made do with what
they had available, and they sailed fine.
Right?  If it doesn't work out, I think I'll probably
just make a foam & fiberglass one for version II.
Well, if you can't work with epoxy, you can at least work on the other parts of the boat, right?  I pulled the ama (outrigger log) out of storage and went after the ends, which I'd done only a little rough shaping on before.  After a bit of work with saw and rasp, I was pretty happy with the shape.


Stern end of the ama is a little fatter than the
bow, because most of the boat's weight will be
carried aft (I think).
  
I pulled out my 1950's-vintage Craftsman belt sander and did a bit of general sanding along the length of the  ama so that it will be ready to paint.  I'd call that effort about half-done; I stopped because the old sander was starting to sound like it needed another overhaul.

Today warmed quickly to around 75 degrees, and I had a fairly open schedule, so I lowered the hull and prepped the chine fillets.  This involved sanding the epoxy-coated plywood I'd be laying the fillets on, hammering the copper stitches down so they wouldn't protrude from the fillets, and masking the entire length of the chines so that I can have a nice clean edge when I'm done. 

I also masked the benches, thinking I might as well fillet them into place while I'm at it.  And I prepared the lashing pads for installation - I forgot to put them on the panels before stitching the hull together.
Chine fillets done.  Note how smooth they are,
compared to the bilge fillet.  Also visible are
the lashing pads (clamped in place) and the
bench fillets.


Finally, I began mixing and applying fillet epoxy.  I've hit on a pretty dependable recipe - 4 pumps each of hardener and resin, then 3 little cat food cans full of microballoons and 3/4 of a can of silica thickener.  The resulting paste is workable, but doesn't sag or flow much at all, a vast improvement over my earlier efforts.

It took 4 batches - 16 pumps in all - to fillet both chines.  Then I changed over to microfiber & epoxy to glue the lashing pads to the hull.  Unfortunately, I grossly overestimated the amount of epoxy needed to do that job, so I was facing the prospect of about two pumps worth of waste.  I hadn't done the benches yet, so I scrambled to mix in the thickener and glass bubbles that would allow that. 
The somewhat gloopy bench fillets.  Since the mix
was so wet, I won't be able to remove the tape
until tonight at the earliest.

Of course, my trusty recipe was off because I was starting with an unknown amount of resin (after applying some to the pads).  So I ended up with a somewhat drippy mix that produced a nice, curved fillet but dripped down the sides a bit.  Cleaned it up with a paper towel as best I could, but I expect there will be some remedial sanding required to fix the drips when it's all cured.

All in all, a very productive weekend.  Looking ahead, there's a bit more filling and sanding to do on the fillets, then I'll be fairing the outside of each, and then (finally) it will be time to fiberglass them.  But I'm almost out of glass balloons, and getting low on epoxy, too.  So I will probably need to place an order for some supplies first. 

Monday, March 26, 2012

Bilge Fillet Complete-ish

Nice weekend weather gave me a window of opportunity to finish up the center seam on my canoe.  I remembered to use the tape trick this time, and the line came out nice and clean (except for the horrors of the frame fillets).  Considering that I don't intend to paint the interior, I think I can live with the result.

The reason I describe it as "complete-ish" rather than "complete" is that there's a sanding and fiberglass taping step still to do.  One smooths the top of the fillet out into a graceful curve, then epoxy and glass tape are applied to protect and strengthen the joint.  Combined with the filler and glass tape on the exterior side of the joint, the result is sort of an I-beam structure that gradually blends into the plywood.

Also, there's a bit of remedial filleting to do before we can glass over it.  Towards the bow, my mixture was a little thin and didn't fill as high as the wire stitches, as you can see in the second photo here.  The glass tape really needs to have a smooth surface to sit on, or else you get bubbles of air beneath it.  So I'll have to fill that in a little, too.

But I think I'll fillet the chines and the outsides of the joints first - that way, I can do my glassing all at once.  Hopefully, that will give me a chance to get "good at it" and produce a better result.

The weather man says that our unseasonably warm temperatures will continue for most of this week, so there should be some good opportunities for filleting in the early evenings.  More news as it happens....

Friday, March 23, 2012

<SARCASM>Oh, How I've Missed This</SARCASM>

It's been a really, really long time since I had anything to report on the boat building front.  I let a week of warm temperatures slip by without resuming the project, because I was finishing up a car project (not a Land Rover, but sort of close: a 1987 4Runner) during that time.  But the 4Runner is finally sorted & registered, and I seem to recall stating a spring 2012 launch goal for this canoe, so when the temperatures rose to epoxy-curing levels again, I knew it was time to put the excuses aside and get to work.

I lowered the hull, swept and vacuumed the dust out of it, and mixed a big batch of thick fillet epoxy to do the semi-vertical stern joint with.  Found that a cat had urinated in the boatbuilding supplies box, right on my dust mask, so I had to mix without a mask.... Had a little trouble getting the mixed epoxy into my ad-hoc applicator system (the Ziploc bag with a corner cut off).... Accidentally spilled epoxy on my table saw table.... And proceeded to make a fair mess of the work, to boot.

When the spills were cleaned up, and all the epoxy had been coaxed into its rightful place (more or less), I straightened up and surveyed the carnage.  To be fair, the stern looks better than the bow, really, and both of these places will be covered by the decks when the boat is done, so I should stop complaining.  Despite the hassle of filleting, it really is good to be back at work on this project.  As long as the weather holds, I'll be working to meet that launch goal, and I'll keep you posted.

Wednesday, December 14, 2011

Videos Are All I Can Offer When It's This Cold Out

Greetings, loyal reader.  Between the frigid weather which keeps my epoxy from curing, and the long list of home maintenance/repair tasks I've been working on lately, there's not much new here in Coastal Colorado.

BUT there are a few exciting new videos to share.  First, Austrian builder Tom Puchner has posted a well-made video of his beautiful Melanesia "Velella" under sail in force 3-5 winds. Velella has admirable finish quality, and I'm especially jealous of his bamboo spars, kiato and hiking poles.
Not only is it the best Melanesia sailing vid on Youtube at the moment, it's also the first one with a decent view of the steering and sail-handling work required.  The video is shot using a GoPro HD camera lashed to the outrigger pole, providing a good view of what's going on.  A few particulars I'd like to point out:

  • Tom's wearing a wet suit, and with good reason.  The Melanesia is a very wet boat - it comes from a culture that never really had cold weather to contend with.  
  • He moves around a lot when sailing it.  Crew weight placement matters a lot in the Melanesia.
  • There's a tacking sequence that starts around 5:30 that gives an idea of how snappy these things are through the wind.  Tom lifts the paddle from the water and sets it in the hull, then scoots forward to encourage the stern to slide around.  He tries once or twice to complete the tack by handing the sail across to the other side, but that doesn't work, so he paddles the bow through the eye of the wind and sheets in.  Elapsed time is close to a minute.  The former casual monohull racer in me cringes at the idea of a tack taking longer than 15 seconds.  I wonder if he'd do better with some ballast stored in the bow?  I've read that can help with this problem. 
  • Compare all that to the jibe at around 0:55.  Just point downwind, flick the sail over to the other side, disentangle one's self from the sheet, and you're done.  Clearly, jibes are far easier than tacking in these, and there was no violence to the transition like you'd expect from other sail shapes.
  • I wonder if it would be better to mount the mainsheet lower on the spar, and lead it to a point a little further forward, out of the ?  It seems to be causing Tom some trouble.
  • In a strong breeze and when the wind's on the hull side (as opposed to the outrigger side), the outrigger float ("ama") dives and throws up considerable spray.  I happen to know that Tom's using a very sleek and buoyant homemade foam ama, so when you notice that happening, imagine it being much worse on a boat with a timber ama like the one I'll probably use.  
What else do you see in Tom's video?

Next up, another, much briefer Melanesia video from an unknown francophone builder.  This one offers a few still shots of the canoe strapped to a van roof and being assembled on the beach, then cuts to some footage taken from inside the canoe while under way.  The camera's POV is too close for the kinds of insights that we get from Tom's video, but there are some good views of the sail lacing and steering position, and the canoe scoots along nicely with two adults aboard. 


The final video I have for you is the launching of James Wharram's latest design, the Melanesia's big sister "Amatasi."  Like Melanesia, Amatasi is a design that carries strong ethnic influences.  It does not use crab claw sails, but it does use the steering paddle and the general hull shape is very similar to the somewhat smaller Tahiti Wayfarer.  The video doesn't really show the craft under way, but it does offer a chance to see designers James Wharram and Haneke Boon in a moment of triumph.
That's all for  now.  I hope to be able to bring my hull into the house for a couple work sessions after the holidays, but until then there's not likely to be much to write about in this boat building blog.

Tuesday, October 25, 2011

Trending

We've been without internet for almost a week now at home.  I could claim that's why there hasn't been much news here lately, but I'd be lying.  Despite the lack of distractions, I haven't made much progress on the hull recently, and now we've got Weather rolling in that should keep me from doing anything with epoxy for the foreseeable future.

So it's a good time to talk briefly about something that amuses me greatly: the trendiness of outrigger canoes.  I noticed not long after starting this build that there were images of outriggers cropping up here & there in popular culture.  I didn't think much of it at first, but then I saw the Patagonia catalog for summer 2011, which prominently featured this gorgeous photo (and a few others) by Trevor Clark of outriggers in the open ocean off Hawaii at sunset.  Most of the shots were of paddling outriggers, but there was one in the catalog of a sailing outrigger as well.

I've seen a few other cultural references to outrigger sailing.  The great and recently deceased navigator Mau Piailug drew some attention as he worked to re-establish traditional navigation skills in the Pacific.  And Hawaiian-style outrigger racing and outrigger surfing began to crop up in the mainland USA.  As a windsurfing friend explained with regard to the stand-up paddleboarding craze, Hawaii has always had a periodic influence on fashion in the USA.

Fast forward....  Today I was faced with proof that outriggers have Arrived, and that I'm participating in a Trend.  The proof?  A US quarter dollar coin with a sailing outrigger on the reverse.  It turns out that  a series of 6 non-state entities were honored with coins in 2009, presumably to mollify them after a decade of state quarters rubbing their collective nose in their political non-entity status.  Among them were the Northern Mariana Islands (the one I'd found), and Guam, both of which featured crabclaw sails in their artwork.  The NMI coin shows a tacking outrigger, while the Guam example uses a proa.  Both cultures mentioned pride in their ancestral seafaring and navigation skills as reasons for including the vessels on the coins.

So I guess I'm a hipster now, building an outrigger canoe like all those other trendy, Patagonia-catalog-reading, US quarter-spending boatbuilders out there.  Who knew we were so commonplace?

If you'll excuse me, now, I need to stop borrowing internet connectivity from the office, and gear up for the bike ride home through the falling snow.  Maybe I'll do a little work on my sail before I go to bed.  It would be nice to have some progress to tell you about next time I'm able to get online.

Monday, October 17, 2011

Focus!

I mentioned in yesterday's post that I'd been avoiding hull work because of my troubles with epoxy filleting.  That's certainly true, but it's not the whole story.  I've also been a bit distracted.

My dad is a lover of antique British automobiles.  It's an illness I have avoided, for the most part, out of necessity: they are expensive toys, and I've consciously chosen a frugal path in life.

But there are times when the symptoms crop up.  I've been frustrated with our modern SAAB wagon recently, because it is unreliable.  It's also expensive to repair, because it's complicated and the engine bay is terribly cramped.  Historically, I've done a lot of our family's car repair, but this machine is just too unfriendly to the driveway mechanic.  It makes one long for a simpler conveyance.

Like, say, a 1974 Land Rover?  Yes, that would do nicely.  One cropped up on Craigslist recently, and the seller was kind enough to show me around the truck even though I made it clear I probably wouldn't be able to buy it.  It's stone-simple, easy to work on, and will probably be purposefully trundling along long after my prima donna SAAB has been crushed and melted down for scrap.

So for a while there, I was reading about Land Rovers online when I should have been filleting my hull.  Until I recognized the pattern, and pulled myself out of it.  I don't want this project to languish because I got distracted; I want it finished and ready for the water when the coming winter draws to a close.

My dad has a saying about this, which he reminds himself of whenever he's momentarily distracted from a goal: "Focus!"  It's a concise way of saying that yes, there are many things that would be nice to have, or fun to do, but you've chosen this thing, and you need to stick with it until it's done before you start something else.  Otherwise, you risk achieving neither because you've spread yourself too thin.

The boat I'm building is only 16 feet long and has a tiny, simple hull.  But it's still a project composed of many little tasks, some of which are tedious.  You don't successfully finish a project like this unless you're able to stay on track and power through the unglamorous patches, like... like... um....

...like an old Land Rover slogging doggedly along a muddy track towards a distant destination.  Yeah, that's the perfect metaphor.

Sunday, October 16, 2011

Epoxy Fillets 2, Rich 1

I've been avoiding the epoxy work on the boat lately, to be honest.  It's much less glamorous than lofting, cutting or stitching.  Worse still, it's messy and difficult to do well, and the prep involves sanding, which I don't like much.  But my collection of plywood parts won't be a boat until I fillet every seam on the thing.

So I finally got a little time and a little gumption together, and filleted another bead along the center seam.  It went much better today - so much so that I'm willing to claim victory over the dreaded epoxy fillet in this encounter.  I think part of the reason was that I'm working in a more open section of the boat, where it was much easier to apply and work the epoxy.  But it also helped a lot that I mixed a stiff batch of epoxy today, so there was no dripping and relatively little flowing or pooling to mess up my efforts.  I'm starting to get a good feel for what the consistency should be, finally.

The epoxy cures noticeably slower in these cool fall temperatures - today's working temp was around 60 degrees F.  I'll pull the masking tape edging up tomorrow morning or so, and if I get favorable weather I'll continue the center seam to the stern post.

Looking ahead, there's still the tight detail work around the stern post to do, and then I'll need to fillet the side panel seams.  So with today's work, I'm something like a fifth or a sixth of the way through the filleting process.  And after that's done, there's fiberglass tape for the inside and outside of every fillet, and then fairing the hull smooth....  Much to be done, in short, but it feels good to make some progress and get a better result than my last few attempts.

Thursday, October 13, 2011

Sailmaking: Sewing Machine Works!

My last couple attempts at stitching the center seam on my sail failed because the sewing machine couldn't handle the 4 layers of fabric, plus 4 layers of masking tape, that I was asking it to sew through.  (I hear that Sailrite machines can handle much heavier stuff than our typical household machine, but I'm not sure even one of those would have been able to do what I was asking.)

The two halves of my crabclaw sail,
together again - for the first time.
Looking at the flat-felled seam instructions from that DIY camping gear site I linked to last time, I decided to try the seam in stages as they suggested.  It was harder on me, because the fabric wasn't all locked in place like it was with my masking tape arrangement.  But it was much easier for the machine, and, with help and coaching from my oldest son, who did a sewing unit in 4-H a couple years ago, we got it done.

As for quality, let's just say it will probably be good enough.  While not all of the wrinkles shown at right are sewn into the sail, a few of them are.  I had problems guiding the fabric straight through the machine, which caused some wandering.  I had problems with the two pieces of fabric feeding at different rates, which created wrinkles.  And I probably didn't have everything pinned perfectly to begin with, either.  Here are some examples:
Bunching caused by one side feeding faster than the other,
then being "caught up" too quickly.
Wandering....  The weight of the fabric made feeding
tough, and it sometimes got crooked on me.


If the sail were plywood, these inaccuracies would represent my weakest effort yet.  But it's not plywood, it's cloth, and I've never done anything like this before.  So I'm going to declare victory and move on. 

Moving on....  I think I should reinforce some areas where the wandering was particularly bad.  Then the sail still needs the polypro webbing sewn across the mouth of the claw (probably by machine once more).  And I'd like to add some reinforcement strips to the tack.  Then I need to sew in the polypro bolt rope, which I'll do by hand.  And finally, I need to attach my snazzy red Wharram logo and sail numbers, which I think I'll try to do by hand again.

So there's a bit of work yet before we have a complete sail.  But tonight's progress moves the project forward past a tough stumbling block, which is great news.