Wednesday, December 14, 2011

Videos Are All I Can Offer When It's This Cold Out

Greetings, loyal reader.  Between the frigid weather which keeps my epoxy from curing, and the long list of home maintenance/repair tasks I've been working on lately, there's not much new here in Coastal Colorado.

BUT there are a few exciting new videos to share.  First, Austrian builder Tom Puchner has posted a well-made video of his beautiful Melanesia "Velella" under sail in force 3-5 winds. Velella has admirable finish quality, and I'm especially jealous of his bamboo spars, kiato and hiking poles.
Not only is it the best Melanesia sailing vid on Youtube at the moment, it's also the first one with a decent view of the steering and sail-handling work required.  The video is shot using a GoPro HD camera lashed to the outrigger pole, providing a good view of what's going on.  A few particulars I'd like to point out:

  • Tom's wearing a wet suit, and with good reason.  The Melanesia is a very wet boat - it comes from a culture that never really had cold weather to contend with.  
  • He moves around a lot when sailing it.  Crew weight placement matters a lot in the Melanesia.
  • There's a tacking sequence that starts around 5:30 that gives an idea of how snappy these things are through the wind.  Tom lifts the paddle from the water and sets it in the hull, then scoots forward to encourage the stern to slide around.  He tries once or twice to complete the tack by handing the sail across to the other side, but that doesn't work, so he paddles the bow through the eye of the wind and sheets in.  Elapsed time is close to a minute.  The former casual monohull racer in me cringes at the idea of a tack taking longer than 15 seconds.  I wonder if he'd do better with some ballast stored in the bow?  I've read that can help with this problem. 
  • Compare all that to the jibe at around 0:55.  Just point downwind, flick the sail over to the other side, disentangle one's self from the sheet, and you're done.  Clearly, jibes are far easier than tacking in these, and there was no violence to the transition like you'd expect from other sail shapes.
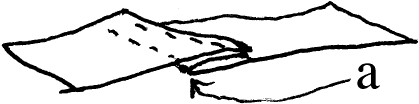
  • I wonder if it would be better to mount the mainsheet lower on the spar, and lead it to a point a little further forward, out of the ?  It seems to be causing Tom some trouble.
  • In a strong breeze and when the wind's on the hull side (as opposed to the outrigger side), the outrigger float ("ama") dives and throws up considerable spray.  I happen to know that Tom's using a very sleek and buoyant homemade foam ama, so when you notice that happening, imagine it being much worse on a boat with a timber ama like the one I'll probably use.  
What else do you see in Tom's video?

Next up, another, much briefer Melanesia video from an unknown francophone builder.  This one offers a few still shots of the canoe strapped to a van roof and being assembled on the beach, then cuts to some footage taken from inside the canoe while under way.  The camera's POV is too close for the kinds of insights that we get from Tom's video, but there are some good views of the sail lacing and steering position, and the canoe scoots along nicely with two adults aboard. 


The final video I have for you is the launching of James Wharram's latest design, the Melanesia's big sister "Amatasi."  Like Melanesia, Amatasi is a design that carries strong ethnic influences.  It does not use crab claw sails, but it does use the steering paddle and the general hull shape is very similar to the somewhat smaller Tahiti Wayfarer.  The video doesn't really show the craft under way, but it does offer a chance to see designers James Wharram and Haneke Boon in a moment of triumph.
That's all for  now.  I hope to be able to bring my hull into the house for a couple work sessions after the holidays, but until then there's not likely to be much to write about in this boat building blog.

Tuesday, October 25, 2011

Trending

We've been without internet for almost a week now at home.  I could claim that's why there hasn't been much news here lately, but I'd be lying.  Despite the lack of distractions, I haven't made much progress on the hull recently, and now we've got Weather rolling in that should keep me from doing anything with epoxy for the foreseeable future.

So it's a good time to talk briefly about something that amuses me greatly: the trendiness of outrigger canoes.  I noticed not long after starting this build that there were images of outriggers cropping up here & there in popular culture.  I didn't think much of it at first, but then I saw the Patagonia catalog for summer 2011, which prominently featured this gorgeous photo (and a few others) by Trevor Clark of outriggers in the open ocean off Hawaii at sunset.  Most of the shots were of paddling outriggers, but there was one in the catalog of a sailing outrigger as well.

I've seen a few other cultural references to outrigger sailing.  The great and recently deceased navigator Mau Piailug drew some attention as he worked to re-establish traditional navigation skills in the Pacific.  And Hawaiian-style outrigger racing and outrigger surfing began to crop up in the mainland USA.  As a windsurfing friend explained with regard to the stand-up paddleboarding craze, Hawaii has always had a periodic influence on fashion in the USA.

Fast forward....  Today I was faced with proof that outriggers have Arrived, and that I'm participating in a Trend.  The proof?  A US quarter dollar coin with a sailing outrigger on the reverse.  It turns out that  a series of 6 non-state entities were honored with coins in 2009, presumably to mollify them after a decade of state quarters rubbing their collective nose in their political non-entity status.  Among them were the Northern Mariana Islands (the one I'd found), and Guam, both of which featured crabclaw sails in their artwork.  The NMI coin shows a tacking outrigger, while the Guam example uses a proa.  Both cultures mentioned pride in their ancestral seafaring and navigation skills as reasons for including the vessels on the coins.

So I guess I'm a hipster now, building an outrigger canoe like all those other trendy, Patagonia-catalog-reading, US quarter-spending boatbuilders out there.  Who knew we were so commonplace?

If you'll excuse me, now, I need to stop borrowing internet connectivity from the office, and gear up for the bike ride home through the falling snow.  Maybe I'll do a little work on my sail before I go to bed.  It would be nice to have some progress to tell you about next time I'm able to get online.

Monday, October 17, 2011

Focus!

I mentioned in yesterday's post that I'd been avoiding hull work because of my troubles with epoxy filleting.  That's certainly true, but it's not the whole story.  I've also been a bit distracted.

My dad is a lover of antique British automobiles.  It's an illness I have avoided, for the most part, out of necessity: they are expensive toys, and I've consciously chosen a frugal path in life.

But there are times when the symptoms crop up.  I've been frustrated with our modern SAAB wagon recently, because it is unreliable.  It's also expensive to repair, because it's complicated and the engine bay is terribly cramped.  Historically, I've done a lot of our family's car repair, but this machine is just too unfriendly to the driveway mechanic.  It makes one long for a simpler conveyance.

Like, say, a 1974 Land Rover?  Yes, that would do nicely.  One cropped up on Craigslist recently, and the seller was kind enough to show me around the truck even though I made it clear I probably wouldn't be able to buy it.  It's stone-simple, easy to work on, and will probably be purposefully trundling along long after my prima donna SAAB has been crushed and melted down for scrap.

So for a while there, I was reading about Land Rovers online when I should have been filleting my hull.  Until I recognized the pattern, and pulled myself out of it.  I don't want this project to languish because I got distracted; I want it finished and ready for the water when the coming winter draws to a close.

My dad has a saying about this, which he reminds himself of whenever he's momentarily distracted from a goal: "Focus!"  It's a concise way of saying that yes, there are many things that would be nice to have, or fun to do, but you've chosen this thing, and you need to stick with it until it's done before you start something else.  Otherwise, you risk achieving neither because you've spread yourself too thin.

The boat I'm building is only 16 feet long and has a tiny, simple hull.  But it's still a project composed of many little tasks, some of which are tedious.  You don't successfully finish a project like this unless you're able to stay on track and power through the unglamorous patches, like... like... um....

...like an old Land Rover slogging doggedly along a muddy track towards a distant destination.  Yeah, that's the perfect metaphor.

Sunday, October 16, 2011

Epoxy Fillets 2, Rich 1

I've been avoiding the epoxy work on the boat lately, to be honest.  It's much less glamorous than lofting, cutting or stitching.  Worse still, it's messy and difficult to do well, and the prep involves sanding, which I don't like much.  But my collection of plywood parts won't be a boat until I fillet every seam on the thing.

So I finally got a little time and a little gumption together, and filleted another bead along the center seam.  It went much better today - so much so that I'm willing to claim victory over the dreaded epoxy fillet in this encounter.  I think part of the reason was that I'm working in a more open section of the boat, where it was much easier to apply and work the epoxy.  But it also helped a lot that I mixed a stiff batch of epoxy today, so there was no dripping and relatively little flowing or pooling to mess up my efforts.  I'm starting to get a good feel for what the consistency should be, finally.

The epoxy cures noticeably slower in these cool fall temperatures - today's working temp was around 60 degrees F.  I'll pull the masking tape edging up tomorrow morning or so, and if I get favorable weather I'll continue the center seam to the stern post.

Looking ahead, there's still the tight detail work around the stern post to do, and then I'll need to fillet the side panel seams.  So with today's work, I'm something like a fifth or a sixth of the way through the filleting process.  And after that's done, there's fiberglass tape for the inside and outside of every fillet, and then fairing the hull smooth....  Much to be done, in short, but it feels good to make some progress and get a better result than my last few attempts.

Thursday, October 13, 2011

Sailmaking: Sewing Machine Works!

My last couple attempts at stitching the center seam on my sail failed because the sewing machine couldn't handle the 4 layers of fabric, plus 4 layers of masking tape, that I was asking it to sew through.  (I hear that Sailrite machines can handle much heavier stuff than our typical household machine, but I'm not sure even one of those would have been able to do what I was asking.)

The two halves of my crabclaw sail,
together again - for the first time.
Looking at the flat-felled seam instructions from that DIY camping gear site I linked to last time, I decided to try the seam in stages as they suggested.  It was harder on me, because the fabric wasn't all locked in place like it was with my masking tape arrangement.  But it was much easier for the machine, and, with help and coaching from my oldest son, who did a sewing unit in 4-H a couple years ago, we got it done.

As for quality, let's just say it will probably be good enough.  While not all of the wrinkles shown at right are sewn into the sail, a few of them are.  I had problems guiding the fabric straight through the machine, which caused some wandering.  I had problems with the two pieces of fabric feeding at different rates, which created wrinkles.  And I probably didn't have everything pinned perfectly to begin with, either.  Here are some examples:
Bunching caused by one side feeding faster than the other,
then being "caught up" too quickly.
Wandering....  The weight of the fabric made feeding
tough, and it sometimes got crooked on me.


If the sail were plywood, these inaccuracies would represent my weakest effort yet.  But it's not plywood, it's cloth, and I've never done anything like this before.  So I'm going to declare victory and move on. 

Moving on....  I think I should reinforce some areas where the wandering was particularly bad.  Then the sail still needs the polypro webbing sewn across the mouth of the claw (probably by machine once more).  And I'd like to add some reinforcement strips to the tack.  Then I need to sew in the polypro bolt rope, which I'll do by hand.  And finally, I need to attach my snazzy red Wharram logo and sail numbers, which I think I'll try to do by hand again.

So there's a bit of work yet before we have a complete sail.  But tonight's progress moves the project forward past a tough stumbling block, which is great news.

Tuesday, October 4, 2011

The Infernal Device

I spent some time last night trying to join the two halves of my sail with my wife's 1980's-era Kenmore sewing machine.  First, I had to pin the sail together in the proper alignment.  I'm planning to use a flat-felled seam, and I want the stitching to pass through all four layers of fabric, so there's a lot of work necessary to get the sailcloth in the proper arrangement before you start sewing.

I tried pinning, but it would have taken dozens of pins to hold the entire seam in place, and then how do you sew it?  Then it occurred to me to use masking tape to hold the edges together correctly.  I can sew right through the masking tape, and the tape should just tear off as the sail is used.  After a bit of work, that job was done, and I had a rather stiff pre-assembled seam consisting of 4 layers of sailcloth and 4 layers of masking tape.  To the machine!

But the sewing machine kept binding, which would require undoing the stitches, cutting the thread, clearing the jam, rearranging everything, and trying again.  Over, and over again.  Once, I even broke a needle; another time, I accidentally disassembled the bobbin assembly while trying to clear it.  That took 15 minutes to sort out....  Somewhere along the way, the thread got routed wrong and the machine was no longer producing stitches. 

My wife was very patient as I clumsily abused her machine.  I eventually figured out that the jamming was due to my not holding the free ends of the thread taut as I started out.  Armed with that knowledge, I successfully produced several inches of pretty, zig-zag stitches before the thread frayed in the needle and I had to stop.  Sigh.....

I knew this process wouldn't be easy, but I was unprepared for the complexity and finicky nature of the sewing machine.  I'll try to pick up a heavier needle and try again tonight.

Meanwhile, here's a neat write-up of outrigger canoes and small catamarans from a British sea kayaking web site.  For the record, I was seriously considering building a sea kayak before I decided on the Melanesia.  I like the mobility and versatility of the kayak, but I wanted something that could carry a flexible number of people, and sail effectively.  The link above touches on all of these points.

Sunday, October 2, 2011

Epoxy Fillets 2, Rich 0

My second attempt at filleting the bow went a little better.  I made a stiffer mix this time (less like Dairy Queen soft-serve and more like regular ice cream).  It was more workable, and I hit on a pretty handy way to apply it in tight spaces: put epoxy mix in a zip-log bag, snip off a corner, and use it like a pastry chef's icing bag to squeeze the epoxy into spaces you can't reach with regular tools.

However, it didn't all go my way.  After filleting the forward third of the bilge to the proper radius, I cleaned up and went to work.  When I got home in the evening, I found that the epoxy had flowed downhill and pooled in the bow.  I now have the world's thickest fillet at the bow.  In the photo at right, you can see how the areas in the foreground were, at one time, covered with whitish epoxy -- but it has all flowed down to the end of the hull, where it's pooled much deeper than necessary. 

One other minor victory: note the clean edges on my fillets at right.  This is due to my friend Steve's masking tape technique, which really does produce a cleaner result than the alternative.  But overall, I have to say that epoxy filleting is my least favorite part of the whole process so far.

Finally, I picked up a cheap nylon windbreaker at the thrift store the other day, and from it cut out the Wharram insignia and sail numbers that will eventually go on my sail, once the sail is sewn together.  The sail number is the number of my plan set; the logo and number together uniquely identify my boat.

I think it looks pretty sharp.  My wife is not fond of the Wharram logo, as she feels that it looks like a pair of breasts.  She's right, it does -- once somebody points it out to you -- and I'm pretty sure the resemblance not accidental, as it was supposedly taken from some prehistoric goddess emblem.  But while I wouldn't sew mudflap girls or a Playboy bunny logo onto my sail, I don't think the resemblance is enough to justify keeping the designer's logo off the sail.  I'm proud that my boat is a Wharram, and I want people to know.  So the logo stays, and if anyone asks, I'll tell them what I just wrote.

Tuesday, September 27, 2011

Filleting, Part 1 (or, "Dairy Queen Owes Me Big-Time")

I tried laying epoxy fillets along the stem post today.  It's my first-ever experience with filleting, and I was really trying for a strong start.  There are gaps between the panels, so I covered them with masking tape to keep the epoxy from falling through.  And a friend suggested using tape to simplify clean-up after the fillet's applied, so I surrounded the fillet area with more tape.

Then it was on to the instructions.  The epoxy here is not the pure, transparent fluid I've been coating panels with; here, it should be thickened with silica powder and miniscule glass bubbles.  Wharram recommends a consistency like "soft ice cream." Being American, I instantly thought "Dairy Queen" and went with it.  What a hassle!  You can't manipulate something like that, you can only pour it.  I poured, trying to get it to flow along the seam.  When it ran down the stem post to the bilge, I tried my hand at pushing a liquid uphill with a plastic knife.

As I fought that hopeless battle, it gradually became clear to me that my boat was leaking.  White fluid was dripping out the edges of the masking tape and pooling below.  I tried briefly to contain that mess, but soon realized there would be no Containment, the best I could hope for was Spill Mitigation.

Fortunately, I had had the foresight to lay plastic sheeting below my work.  Unfortunately, that had happened in a parallel universe inhabited by a slightly smarter version of me.  Here in this universe, there was no protective sheeting, only a growing puddle of epoxy directly on the concrete floor of our porch.  I wiped up the mess with some paper towels, grabbed some plastic, and spread it under the leaking hull. 

I then quickly mixed up another, smaller, much stiffer batch of epoxy and stirred it into the dwindling puddle of fluid in the bilge.  The result was a slightly more workable substance that I managed to push into some of the nooks and crannies of the bow.  Finally, I had done the best I could with what I had to work with, and cleaned up.  The score was clearly Epoxy Fillets 1, Rich 0.

Looking back on the debacle, it occurs to me that they may not have Dairy Queen in the UK.  Their standards of what constitutes "soft ice cream" would therefore be vastly different from my own.  Next time, I will try to use a firmer mix, and will post the story of the rematch here.

Sunday, September 25, 2011

Rigging plans

I've been studying the crab claw rig a bit, hoping that it will make sense by the time I launch.  It's very different from Western sail rigs, so a lot of my experience won't apply.  Here are a few of the things I've learned:

Weather Helm
When I learned to wind surf last month, I had some trouble sailing downwind until I understood the physics of it.  As you turn off the wind, you naturally end up with all of the sail on one side of the board, and this creates weather helm - the sail is levering the board around.  To correct on a windsurfer, you center the sail over the board.

Weather helm - the "x" marks
the sail's center of effort
Weather helm corrected.
Note the center of effort is in line
with the hull.
I think the crab claw rig will behave similarly.  If the mast is vertical, all that sail area to one side will tend to turn the boat hard, as shown in the diagram at right.  But if one uses the shrouds to change the mast angle, as shown on the right, the weather helm disappears.

The practical offshoot of this is that I need to be able to adjust the shrouds as I'm sailing, which means I ought to lead those lines aft to the helm.  I'm picturing blocks rigged to the forward outrigger pole, and the lines running from the mast, through those blocks, and back to cleats on the aft outrigger pole.  This is a minor departure from the plans, as Wharram recommends a simple toggle & deadeye arrangement.


Reefing
I mentioned last week that crab claw sails are reefed in an odd manner.  In Western sailing, the sail area is physically reduced by tying (or rolling) some of the sail along the spar or headstay.  The crab claw doesn't reduce sail area at all - instead, there are "spill lines" that bring the spars together and spill wind.
Full sail
"Reefed - the sail is allowed to curve excessively,
spilling wind and reducing the boat speed.
I plan to rig this system on my Melanesia even though it's not in the plans, because I want it to be as seaworthy as possible.  I'd like to be able to sail her in open ocean conditions, and even if I never do, I've had bad experiences right here in our little Colorado lakes with sudden storms blowing up.  Being able to reef in high winds is the difference between being windblown flotsam and a working sailboat.

Practically, this means that I should have four more blocks rigged - two blocks for each reefing line, and one reefing line for each side of the sail.  These lines, too, will be led aft to the helm, where I'll cleat them off.  If you need to reef, that's not a great time to have to abandon the helm station and walk around in the canoe.

Rigging for Load Variations
Because steering the Melanesia depends on the sharp bow holding the water, she's rumored to sail funny when there's no crew to hold the bow down.  Wharram even recommends carrying a 5-gallon water jug (40 lbs) to ballast the bow when sailing without crew!

I've heard of some Melanesia sailors being completely unable to work to windward because of this problem.  But I know that moving the center of effort forward can increase the bow's tendency to slide off the wind.  So being able to change the angle of the mast by adjusting the forestay will be helpful in handling the boat as load changes occur.
Light load, rig tilted forward:
this boat will not go to windward.
The rig should be brought aft to improve
windward performance (I think).


Normal load, rig too far aft:
This boat will tend to round up into the wind,
making it hard to sail in any direction.
The rig should be brought forward to balance the helm.
(I think...)
The practical implications here imply that I need to be able to adjust the forestay, but not necessarily that it needs to be led aft like the other lines.  The only situation I can imagine where I'd want to quickly change the angle of the mast would be if I lost my crew overboard and needed to sail to recover them.  But in that situation, it would probably be best to let the sail luff and paddle to the swimmer.  So here, I'll probably use a toggle and deadeye arrangement like the plans suggest.

Disclaimer
All of these diagrams and ideas are based on "book learnin'" rather than actual experience.  It may be that once I get my Melanesia launched, I find I've got some part of this totally backwards.  We'll see; for now, I think I understand the way the rig will behave, and these are my best guess at ways to improve the seaworthiness of my Melanesia.

Thoughts on Stitching

Now that the hull is stored in a manner that allows me to quickly move it into and out of storage, I'm back to construction.  Today, I finished installing the stitches and began taking up slack in places where the seams were gapping too much.  I also screwed the seats in place (temporarily), as they're integral in shaping the hull as well. The rear seat really didn't seem like it was going to fit, but I used a clamp to bring the hull into alignment with it and it worked out.  Gradually, as I installed and tightened the stitches along the open seam, it closed up and took the shape it should have.

So, with the hull shape coming together nicely, I thought I'd collect a few lessons I've learned about stitching for the benefit of other builders.  Here they are, in no particular order:

  • Wire stitching hurts.  The wire ends are sharp, and spaced closely enough that it's hard to avoid occasional scratches.  My hands look like I've been teaching a knitting class for feral cats.  
  • I notice that a lot of photos from pro builders show zip ties rather than wire.  Presumably, that's because wire hurts.  But it's also stronger than zip ties are, and cheaper if you're salvaging waste wire from construction sites.
  • If you're salvaging wire, you can remove it from its insulation with a knife blade.  Set the wire on a cutting board or work bench; press it in place with a sharp, strong blade angled to cut along the wire.  Pressing the knife against the cutting board, pull the wire past the knife rather than pushing the knife through the wire.  It's a vastly more efficient way to do it.
  • If you're going to use zip ties, you might want to get a "fourth hand" tool (shown).  It's a bike tool designed to pull on cable while you adjust brakes; I discovered when working at bike shops that it's also great for tightening zip ties. 
  • Zip ties would require larger holes than wire, so there would be a bit more filling required after you're done.  I've seen some builders complain about this.
  • A single stitch point isn't strong enough to hold the hull shape near the twisty parts.  I tore a couple stitch points out trying to move the partially-assembled hull when those wires were all alone at that end.  I should have waited - all of the stitches, working together, are strong enough to prevent that problem.
  • The plans mention a "pull, twist, pull, twist" rhythm for tightening stitches.  This works great.  But the best way I've found to pull is to lever my pliers against the hull, which occasionally gouges the ply there.  You might want a putty knife to place between the pliers and hull, to spread out the force of your prying pliers.
  • If you're trying to close a gap, remember that no one stitch can do it alone.  (Remember, the individual stitches aren't that strong?)  Work along the line of stitches, one at a time, and watch the gap disappear gradually without stressing any stitch excessively.
  • If you do pull a stitch through, you can either redrill holes slightly to the side, or use clamps instead of wire at that spot, depending on the shape you're dealing with.
  • The beauty of stitch & glue construction is the flexibility of the hull during the stitching phase.  Take the time to get it right - aligned, symmetrical, perfect -- because once you start filleting, you're locking that hull shape in forever.
  • And finally....  I've always fantasized about building in welded sheet aluminum.  I think you could stitch & weld just as easily, and skip a lot of epoxy coating.  If I ever build a larger boat, I'll be tempted to try it.
That's all for now.  Weather permitting, I'll put some more time in tomorrow and maybe be ready to start filleting by the end of the day.

Saturday, September 24, 2011

Storage System

I've rigged a storage system on my porch with a couple wall hooks, a couple pulleys overhead, and a bit of rope.  I've managed to rig it so that there are three positions:
  1. for pure overhead storage, 
  2. hangs the hull at chest level (handy for stitching work), and 
  3. hangs the hull at knee level (handy for fillets and other work where you really need access to the interior).

The system works like this:

The rope is tied to the stem and stern post handles, then goes to the overhead pulleys.  From there, it goes to the wall hooks.  There are two loops between the pulley and the wall hook, each corresponding to one or more positions.  The inline loop, when attached to the wall hook, yields the storage position (#1).  The bowline at the end of the line yields position #2.  And if nothing's attached to the wall hook, the inline loop jams the pulley and holds the hull at position #3.

Overall, it works okay, I guess.  The "overhead" position isn't quite over my head, which means that I occasionally gouge my scalp on stitching wire if I forget to duck.  But I'm taller than everyone else in the family, so I'm only inconveniencing myself.

I can't hang it higher because I'm joining two lines together (to save money) and the join won't pass through the pulley.  So obviously, it would be better to have enough rope to hang it properly.  I might re-rig it when I purchase the line for the sheets, shrouds and forestay.

And I think it would be better to have cleats on the wall, so that the system would be infinitely variable rather than the three-position rig I ended up with. But again, cleats are expensive. So I'll tough it out with this setup for a while longer - hopefully, the stitches will be replaced by fillets soon and it won't matter so much whether I knock into it.

Wednesday, September 21, 2011

It's a Boat! (Sort of....)

I stitched the sides panels on today.  The first was done before I left for work, and I added the second one after I got home.  There was a little trouble getting things to line up right - the sides want to ride up on the ends, leaving gaps at the chine and covering the handles.  But I was able to fix that by using a clamp between the gunwales and the keel, then tightening the wire stitches.


The hull takes a very slim shape until you force the seats into place.  This encourages the sides to curve properly, which helps the ends of the gunwales fit properly at stem & stern.  The seat shown is in only temporarily here -  I need to trim the aft seat to fit the taper of the hull before it will fit at all, and the forward seat needs to be notched to fit around the butt joints, too.  So the hull shape will change a bit yet, but it's not far off now.

With the seats in place, the hull has a beam of about 22" at the widest -- narrow! And it's long!  Assembled, it's not heavy, but it is awkward to move around.


There's still some stitching left to do.  After I get the last stitches in, tighten everything up and double-check the lines, it will be time to start packing the seams with epoxy fillets.

Sunday, September 18, 2011

Ama (?)

We spent the weekend in the mountains, in the presence of good friends and a lot of tempting timber.  Finally, when I found a downed aspen trunk that looked straight enough and about the right size for the ama (outrigger), I couldn't take it any longer.  I asked our hosts if they would mind me taking the tree, and they gave their permission enthusiastically when they heard what I wanted it for.  Turns out they'd given permission for a relative to fell the trees for a project, but he got a job out of town before he could use them, and they'd been languishing since.

So I now have a 13' aspen log on my dining room table. 

I've stripped the bark off of it, and it's firm wood with no rot damage.  I've also taken from the plans some rough "by eye" guides for the shape of the finished ama's cross-section at certain points:


However, there's one small problem, and it has cropped up every single time I've dealt with found timber: It never turns out as perfect as you thought it would.  It's always a little crooked, or a little too short, or something. 

In this case, the aspen trunk is a bit crooked, but acceptably so.  The real issue is that none of what I brought home quite reaches the 4.75" diameter recommended in the plans.  The fat end is a little too skinny:
A 4.75" circle leaves gaps all around at the
fattest part of my ama candidate.  Is this okay?
and it just gets skinnier from there, down to around 3.00" diameter at the skinny end.  So there's a real chance that this ama won't provide enough flotation when it's on the leeward side, or enough weight when it's on the windward side.

On the other hand, it's aspen, so it's light and strong.  And it's by far the closest thing I've found so far, unless you count the two-piece aspen trunk offered to me by a friend.  And having stared at a fair number of tree trunks now, I have to say I'm not sure I can find anything else this straight.

As for whether it's too light.... outrigger guru Gary Dierking has instructions for a foam and fiberglass ama on his website, so flotation must matter more than weight.  Flotation is a product of size and density; this ama is a bit small, but it's also at the low end of the recommended density range, so it might work out after all.

So my plan is to set it aside, maybe work a little on shaping it when I have free time, but not to invest too much in this piece until I decide it's my best option.  When I'm done with the hull, I'll shape an ama out of the best piece of wood I have at that point.  If initial sea trials are disappointing, I might even try Gary's foam & glass option. 

Friday, September 16, 2011

Link Dump

Won't be much news around here for a couple days, so here are a couple links of interest to outrigger sailors.

  • First, a document about how to handle the "Malibu Outrigger," a sailing outrigger one-design class.  Of particular note are the sections about safely launching and landing through the surf on a beach, which I've been wondering about.  This link comes to you courtesy of Tim Anderson, outrigger adventurer extraordinaire.
  • And second, I've also been wondering how the heck one reefs a crab claw sail.  Well, according to this article on Proafile, one doesn't "reef" (i.e., reduce sail area) a crab claw.  But one can "de-power" it quite effectively by means of a line between the spars.  Scroll down to the section titled "Reefing" to read about it - though the rest of the page has some good info, too.

Wednesday, September 14, 2011

Dreaming

I managed only a little progress today.  The lashing pads I cut out last night are shaped and matched, a process made vastly easier by the belt sander.  There are 12 lashing pads, and I'm not great at assembly line work, so I had 12 slightly different rectangles when I set the saw down.  No worries - clamp them tightly together and run the belt sander over the edges until they're all identical(ish).

I put the first coat of epoxy on the lashing pads this evening.  While I was spreading epoxy, I coated the last little bit of the stem & stern post tapers, and did the flip side of the deck beams I started on yesterday.  Here's the night's work, all layed out and curing.

Life is about to get a little busy again - some wet weather is headed our way, which forces me to stow my panels indoors and keeps me from using little scraps of time here and there for small boat tasks.  And I don't expect any significant time to work on the boat out of the next five days. 

So I've started dreaming a bit, which is dangerous.  (cue dream sequence sound effects...) One of my dreams for this boat is to take it on some coastal expeditions.  I'd start out with something mild and forgiving, like Padre Island, Texas, but I'd love to someday sail California's Channel Islands in it, like Tim Anderson did in his slightly larger outrigger canoe.

And, don't forget, there are also the WaterTribe races, the "best known" example being the Everglades Challenge.  All of their races are designed to test small craft and their skippers for versatility, seaworthiness, endurance and portability.  Entrants frequently use sea kayaks or similarly minimalist boats, sometimes rigging a sail for the downwind portions.  But there are also classes for small mono- and multi-hull sailboats. The Melanesia would fit the Class 5 definition, I believe, provided something were done about reefing the crab claw sail and building positive flotation into the hull.  Personally, I'm not big on swamps, gators or mosquito clouds, so I might give Florida a pass.  But the North Carolina Challenge?  That sounds fun. 

Whoah, there, did I just say out loud that I'd like to enter my as-yet-unbuilt outrigger canoe in a 100-mile endurance race, or sail it offshore in Southern California?  That's crazy talk.  Get the boat built, learn to sail it, try a little local camping expedition with it, maybe.  That's lofty enough for the time being. 

But it's definitely true that these crazy visions keep me motivated.  There's not much glamour in mass-producing lashing pads, so every little bit helps.

Tuesday, September 13, 2011

Sweating the Small Stuff

Here's a tip for any aspiring Melanesia builders out there: finish shaping all of your parts before epoxy coating them.  Otherwise, you'll end up having to do tiny-batch coating on things like the stem- and stern-post tapers, which is where I am now.  It's frustrating because it's keeping me from stitching the panels together and moving forward.

Since I'm using pumps with my epoxy, the smallest batch I can mix is way too big for the tiny spots I'm coating, so I've been looking around for other small parts to work on.  Oh, yeah, the deck beams and lashing pads!  Completely forgot about those....  So I put a first coat on the deck beams and cut out a bunch of lashing pads last night.  I'll finish the last of the stem/stern post touch up today, and coat the pads & beams while I'm at it.  Once that's done, it will be stitching time.

Friday, September 9, 2011

Melanesia Video

For a while now, I've been searching for video of a Melanesia under way.  It would be so helpful to see the rig in action, to see somebody using a steering oar, to see the details of somebody else's finished boat.  But there were none... until a few days ago.  Here's Youtube user andy4us's video, taken during a sea trial in his almost-finished Melanesia:

Monday, September 5, 2011

Momentum

Stem post - what will become the bow.
A long weekend and some beautiful weather gave me the opportunity to really leap forward on the build.  By the end of the day today, I had the sheer stringer/gunwale bonded to one of the side panels, bevels planed on all panel edges, and had begun stitching the bottom panels together.

Stitching is a major milestone, because it's at this point that the boat stops being an entirely imaginary thing.  As you can see in the photo at right, the stitching process transforms flat panel shapes into a curved hull section.  It is now possible to squint and see the boat emerging from all of this work.

That said, I've really stitched more together here than I should have.  The stem and stern post finish work isn't complete - there's Sharpie and rough epoxy visible on the stem post photo at right - so I need to extract them, sand 'em a bit further, and lay on some more epoxy before reassembly.  I couldn't help myself, I needed to see the shape.

Center frame forces panels near-horizontal;
in distance, stem post forces panels near-vertical.
Between, ply visibly twists into the proper shape.


When you begin stitching the bottom panels together, there's nothing to keep them from lying flat, face-to-face.  That's where the frames come in.  There are two frames, one exactly amidships and another about 35" further aft.  They force the plywood to lay almost flat at those spots, and the stem- & stern-post stitching force the plywood to lay almost vertically at the ends.  In between, you get a "tortured plywood" hull shape that transitions gradually for the first 8' of the hull, and more quickly at the stern.  This produces a sharper bow and a rounder stern, which are important in handling the canoe under sail later on.

Over the next week, I'll complete the second gunwale installation, drill the side panels to mate with the bottom panels and end posts, and complete the finish work on the end posts.  Once those things are done, it will be time to complete the stitching, at which point I'll appear to have a hull.  But the stitching wire's job is just to hold the hull in shape temporarily.  That shape then gets bonded together permanently with fillets (thick seams) of thickened epoxy and fiberglass tape.

I suspect that the filleting will take a couple weeks worth of evenings and weekends, and there are the decks to install, too.  So we're not likely to have a complete hull before mid-October at the earliest.  And even then, there's the issue of coming up with the ama, outrigger poles, steering paddle, spars, completed sail, rigging.... sigh.  This canoe will almost certainly not sail this fall.  But it's conceivable that it might float as a paddling canoe before winter sets in.  That would be great motivation for the finishing touches, so that I can have a proper launching in the spring.

Even that modest goal of a spring launch is the product of a rosy outlook, but it's a rosy outlook fueled by the vision of a hullshape finally starting to emerge from my odd collection of plywood shapes, and that should keep me rolling for a while.

Saturday, September 3, 2011

Impatient!

With life settling down a bit, I've been anxious to make some headway on the boat.  I'm in the middle of epoxy coating the interior panels, which requires two coats to achieve an even, thorough protective layer.

Unfortunately, you can't rush the chemical process of curing epoxy.  So I've been coating, waiting, sanding, cleaning, coating, waiting....  I've set up a workstation in the back yard, where I have a piece of plywood on sawhorses and covered with a sheet of plastic.  The weather has held, for the most part, and the only real problem is the thousands of grasshoppers who can't wait to scratch their initials in my finish surface.

The payoff for all this waiting, though, is very exciting: the next step is stitching the hull panels together.  That will be a red-letter day.

Other facets of the build....
  • Rounding up found lumber: as mentioned before, I have a line on a carbon fiber windsurfer mast.  No real movement on other poles or the outrigger ama itself.
  • Sailmaking:  I'm displeased with the quality of my hand-stitched center seam, and trying to figure out how to run the fabric through my wife's fragile sewing machine.  Need to source some stout machine-friendly thread and learn how to use the infernal device....
  • Paddles: I lofted the lines for the steering paddle onto a piece of scrap 2x12 the other day, but the plank has a lot of twist to it, and I don't think that's going to work.  So I think I need to go buy more wood to laminate another blank together, before trying to shape it.  I also need to get belts for my 1950's Craftsman belt sander.  The teardrop-shaped propulsive paddles are awaiting final finish sanding and varnish.

Tuesday, August 30, 2011

Bottom Panel Join

Life has not provided much project time lately.  But the other day, I managed to sneak enough time to make the final cut in the bottom panels.  I had misinterpreted the plans, thinking that the bottom of the canoe was formed from a single tortured panel.  It was very confusing, trying to imagine how you could possibly force the plywood to take the shape I knew it needed to take.  Eventually, I realized (thanks, Terry!) that the bottom is actually two panels stitched together at an angle.  It all makes so much more sense now.

Today, favored with good weather and a little free time, I set up my makeshift bench outside and used it to bond the 4 bottom panel halves into 2 bottom panels.   I skipped the boat nails this time, because the shortest bronze ring nails I could get are a little longer than two thicknesses of my plywood.  This made the clamping stage a little bit fiddly, but I made it work by using the arrangement shown in the photo below.

Having sworn last time not to skimp on epoxy when joining panels, I made far too much this time.  It was thickened with ground fiberglass, but it seemed to work acceptably, so I used the remainder to coat the panels.  Spreading it seemed to work the glass fiber out of the mix, so that it behaved more like regular epoxy.  Hopefully, it won't be too messy to sand smooth and recoat later.

The powder/epoxy mix didn't come close to covering the entire surface I had laid out, so I mixed up another batch of plain epoxy and coated everything.  It was the first coat on the bottom panels; I have a couple other pieces waiting for coat #1, and then everything will need a second coat before I can begin stitching things together.

A few other items:
  • I scored a Ryobi random-orbit sander for $5 at a church rummage sale.  Random-orbit sanders are optimal for finish work because they produce more regular finshed surfaces than non-random-orbit models.  Great deal!
  • My system for hanging the work in the porch ceiling is really poor.  I threaded some rope through pieces of PVC pipe and expected it to stay level as I hoisted it up, but it wants to flip over instead.  I'll need to work out a better answer before too long.
  • A friend who's into windsurfing is giving me a 2-piece carbon mast with damage to the joint.  If I can repair the damage, I could have a very light, very strong spar for the crabclaw sail.  I like this idea because it means less weight aloft, which makes it harder to capsize the canoe.  Now I just need another broken windsurfer mast for the other spar....

Monday, August 15, 2011

I'm Back! Also, Prehistoric Pacific Navigation

If you looked at the long lag since my last post, you might think I'd died or given up on the boat or some similar tragedy.  But no, I've just been away off & on since late June, visiting Maine for my grandmother's 90th birthday and, a month later, her funeral.  In between, my wife and I took a few weeks to drive to Maryland and back to visit other family and show the kids around our alma mater.

Along the way, I've been lugging around a copy of We, the Navigators by David Lewis.  It's a scholarly (i.e., thorough and somewhat dry) treatment of the various ways that Pacific seafarers managed to get around without charts, magnetic compasses, or any other modern instruments.  Like any other indigenous culture, it all boils down to thousands of years of accumulated wisdom about surviving in their part of the world.  Such knowledge is difficult to keep alive these days, and not something you can fully understand if you're not of the culture that produced the body of knowledge.

But Lewis sailed thousands of miles with Melanesian, Polynesian and Micronesian navigators to better understand their skills.  He does a great job of breaking down the various facets of their navigational techniques, and explaining each.  I think I got a few ideas that might help me with my much simpler coastal navigation tasks on our next charter. It was also inspiring to see what they were capable of, these people behind the indigenous design I'm building.


Meanwhile, I've resumed work on the boat.  I epoxied the butt joints in the side panels yesterday, which went... so-so.  I clearly should have used more epoxy; I fear that there are some voids in the joints, but they're not so bad that it would make sense to rip them apart and try again.  Note to self: for critical points in the build, let's not be stingy with the material that keeps the boat together.

I still have the bottom panels to join, and there's a funny story there.  I've been puzzling over the rather extreme flex that's put in the bottom panel, wondering how people manage to do that.  My confusion lasted longer than any reasonably intelligent boat builder could explain.... Eventually, I realized that the bottom panel as I have it cut out is actually supposed to be halved longitudinally.  So I'll be digging out the ol' saw one more time to do that cut, then joining the fore & aft sections of each of the bottom panels with more butt joints next. 


Finally, I came across a very nice Flickr set from Tom Puchner, an Austrian builder.  I'd seen a photo or two of his Melanesia launch party, but had missed his construction shots.  They're great, as are the very artistic shots from his recent test sail with a new, hollow ama.  Any time I feel my motivation flagging, I'll take a look at the beautiful  photo to the right and let it work its magic: keep at it, and this could be you sailing home as the sun disappears beneath the waves.

Sunday, June 26, 2011

A Brief Pause

Well, my schedule will be keeping me away from the boat project for most of the next month.  I had hoped that the boat would be finished and ready to try out by mid-July, but that's clearly not going to happen.  Let's take stock of where the project sits now:
  • 2 paddles ready for finish work, but I still need to start the second attempt at a steering paddle.
  • Hull panels cut out; some epoxy coating done, but less than half of the interior surface area has gotten its first of the recommended two coats so far.
  • Sail panels cut; stitching panels together about 1/3 of the way done.
  • A lot of timber collected, but I still need the outrigger float and 3 long, thin poles.
  • All materials and necessary tools purchased except for incidentals like rope, twine and paint.
 Recent car repairs have taken me away from boatbuilding, and I couldn't start filleting until the last of the materials arrived earlier this week.  So I have some good excuses - but I'm concerned that I won't get the chance to use the boat before this year's sailing season is over at this rate.

I'll post more news when I have time to make some. 

Saturday, June 18, 2011

Sailmaking

I slathered a layer of epoxy on the interior sides of some panels the other night, but the really big news here is that I've begun to make my sail.  I got the fabric today from Rockywoods, and by the end of the evening I'd measured and cut out the two halves of the sail.

The fabric (a 4-oz ripstop polyester) is attractive and lightweight.  One side is coated with a urethane treatment of some sort, so there's a slight color difference between the sides.  But appearance isn't high on my priority list, and anyway, it'll look way better than a blue tarp would have.

Squeezing 57 sqft of sail into 5 yards of fabric.
I rolled it out and followed the instructions in the plans for squeezing the entire sail into 5 yards of fabric.  (The plans discuss doing this with 6' wide fabric; my fabric was about 5' wide, but it fit.  Just barely....)

For a while, I was at a loss as to how to get the shape from the plans to the cloth.  The plans list the length of the curved head and foot of the sail, and they list the length of the center of the sail, but there was no list of offsets at various station lines like there had been for the plywood.  There was also some confusion as to how I could get the proper curve for the hollow at the open end of the crab claw.

I had learned in my navigation class how to use an engineer's scale to read a measurement from a nautical chart, and I had heard somewhere that you can do the same thing with boat plans.  So I got the engineer's rule from my nav gear and confirmed the width of the sail at the top, which allowed me to determine that the sail curves inwards one foot from the tips to the center.  Once I've joined the two halves, I'll draw that curve in with a batten.
If you look closely at the full-sized version of this pic, you can see that the plans read 6'7" (or 79") along this line.  The plans are at 1:10 scale, and I've laid the 1:10 edge of my engineer's rule along the line.  This allows me the determine that the length shown is indeed 79".  It's unnecessary for this sort of situation, but this technique is useful if you want a dimension that's not given in the plans.  As long as your rule has a scale that matches the scale of your plans, it will work.

I decided the best way to get the shape of the long curve onto the cloth would be to carefully mark the three corners, then mark the length of the curved side on a batten, and then use exactly that much batten to draw in the curve.  My boys helped again - they're getting to be pro's after the plywood drafting job.

I soon had the shape of the two sail halves drawn in, but it would be a mistake to cut along those lines.   The center seam needs some overlap, and it takes fabric to enclose the rope that's supposed to strengthen each edge.  So I traced in a second line in a different color, 1.5" from the edge of the sail, and this is the line I cut.

When it was all done, I had two halves of a crabclaw sail.  I couldn't resist the temptation to lay them out together to get a sense of the full size of the thing.  At 57.5 sqft of sail area, it's a pretty powerful rig.  Setting it out in the living room brought that home a bit - it seems bigger than the sail for my El Toro dinghy, which weighs about the same.

Next up in sailmaking: I'll be pinning and stitching the center seam together.  I also need to procure some rope for the edges so I can sew those in.    I may also cut some reinforcement radius pieces for the corners out of my meager scrap pile.  It seems smart - most sails have reinforcement patches there.

Meanwhile, I still have interior epoxy coating to do.  Everything is supposed to get two coats, with a bit of sanding between.  And if I'm close to having a sail, I really ought to consider getting the spars finished.  Plenty to do!

Wednesday, June 15, 2011

Big Spender!

My tight budget finally reached the point where I was able to order the epoxy, fiberglass tape, and other specialty supplies needed to assemble the hull.  So today, I placed an order with Merton's  Fiberglass & Marine Supply for those materials.  Their prices were good, their website informative.  They don't do e-commerce, but they took my order over the phone (~$155) and promised to ship it out later in the afternoon. 

There were a few decisions to agonize over in this purchase.  First of all, what epoxy to use?  Since I was given some cast-off System3 epoxy, with mixing pumps, from a friend's Eastport Pram build, it seemed best to stick with that brand.  Next, what size?  The cost per unit drops steadily as the size of the container goes up.  The plans recommend (3) of the West System "A" size packs, which are about a quart each; Mertons' offered System3 in 0.75gal or 1.5gal sizes.  The bigger size was very tempting, especially because the smaller pack is probably not quite enough to build this boat.  But I still have a quart or so in the hand-me-down jugs, so I decided to stick with the smaller pack.

Next, I turned to sailcloth.  Sailrite sells a 4oz Dacron (polyester) sailcloth for $11.95/yard, but I calculated that I'd need 5 yards of it.  Sixty bucks is a bit expensive, especially if one makes a mistake with it.  I found a local supplier - Rockywoods Fabrics in Loveland, CO, mentioned earlier in the blog - who carry a 4.5oz ripstop polyester fabric for $5.09 per yard. That puts 5 yards into the ballpark of polytarp costs (around $23 at Home Depot for a tarp large enough to make the sail, -vs- $26 for the Rockywoods deal).  I'm sure the Dacron sailcloth would be superior, but I'm just as sure the sail's performance will be limited by workmanship more than materials in any case.  So Rockywoods wins.

And speaking of workmanship, the plans discuss in detail how to finish the edges of the sail, but they don't discuss how to stitch the two panels of the sail together.  I've never done this sort of thing before, so I'm a bit concerned about that.

Tim Anderson's illustration of a felled seam
Proa enthusiast Tim Anderson to the rescue. His account of sailing around Yucatan in a homebuilt proa included some notes and drawings of various stitch and seam types. (Search for "seam" to find the relevant passage, or just read the whole account if you need a little entertainment.)  On the basis of Tim's discussion, I'll be joining the halves of my sail with a felled seam and avoiding "Frankenstein" stitching.


The next big steps out here are to butt the hull panels together and coat all interior faces with a layer or two of epoxy.  Until the Merton's order shows up, I'll be spending my spare time on those tasks.  More news as it happens.

Monday, June 13, 2011

Cuts Complete, Building Begun

After all the work it took to loft the patterns onto my plywood, actually cutting the pieces out was almost anticlimactic.  It took two modest chunks of my weekend and required no help, whereas the lofting took a long evening and another entire morning with help from my kids.

I had thought about using the Japanese pull saw for much of this process, but that didn't work out.  I have trouble controlling the direction of my cuts as closely as I'd like with that saw, and it's not exactly gentle on the top veneer of the plywood, either.  My trusty circular saw is easier to hold straight, and chips the veneer less to boot.  By adjusting the saw for a pretty shallow depth, I was able to cut the gentle curves of the side and bottom panels with it.  I used my brother's jigsaw on the really curvy parts, like the stem and stern posts.

The only problem with the circular saw is that it has a very wide kerf.  "Kerf" is the portion of your wood that is turned into sawdust by the action of the saw.  My circular saw is fitted with a nice carbide-tipped blade that's at least 1/4" thick at the cutting tips, so it chews a good 3/8" path through the plywood.  The jigsaw was closer to 1/8" kerf, and the pull saw is even thinner than that.  So any time two pieces were really close together on the plywood, I'd set the circular saw aside and pick up the pull saw for that portion.

In the end, I am pretty happy with the accuracy of my cuts.  I think they're all within working tolerances, and I didn't make any expensive errors that require another sheet of plywood to fix.  I'm afraid I don't have pictures at this time, but I'll try to post some soon.

The end of the cutting process leaves one with six ~8' panels - two for the bottom and two for each side; a bow and stern deck; a number of delicate arcs to reinforce the midships end of the decks; scrap for butt plates and lashing pads; and two each stem post and stern post.  These last are duplicated because they're laminated to double thickness; Sunday night, with a little spare time on my hands, I decided to go ahead and laminate them.

I mixed a single-pump batch of System 3 epoxy, spread it liberally on both mating surfaces, and joined them.  After wrapping the whole affair in plastic bags to keep from accidentally bonding tools to the work, I clamped each set of posts with 4 clamps, 2 of which were on chunks of scrap wood to distribute the load.  A day later, they look pretty good - solidly joined and lined up correctly with each other. 

Next up, I need to build a way to stow the long panels when they're joined.  I plan to hoist them overhead into the rafters on the porch; I'll try to diagram or photograph that system for a future posting.

Friday, June 3, 2011

Mystery Solved: A Small Error in the Wharram Melanesia Plans

I mentioned in my previous post that there was one station point that just didn't line up with the curve of the side panels.  I quintuple-checked my measurements of that point and its neighbors, of the station lines themselves, and of all the figures on the plans related to any of these items.  In particular, I checked and rechecked my math, because I'm working in Imperial units, and it can be easy to go awry when adding unlike fractions.  At every step of the way, it all checked out except the location of that point on the curve.

Searching online for phrases like "Wharram Melanesia error" or "Wharram Melanesia station line" turned up nothing obvious, either.  I had just about decided to email the Wharram office and see if they had any ideas, when a thought occurred to me.  The Wharram folks, being Brits, work in both metric and Imperial units, and the plans are marked with dimensions in both systems throughout.  Not having access to a good construction tape measure with metric markings, I've been using the Imperial measurements.  But what if there was an error in the conversion?

I checked, and the numbers didn't match up.  The plans give the depth of the side panel at that point as 13 3/16" (around 13.19") or 351mm.  But 351mm is equivalent to around 13.82", not the 13.19" indicated.  When expressed as fractions, it's easy to see the potential for a typo in the two numbers - 3, rather than 13, 16ths. 

(In case you're reading this after searching for an explanation for the errant point on your own Melanesia, dear reader, the point in question is the side panel curve at the second station line forward of the center joint.)
I checked the position of my curve at the spot in question, and it came in around 13.7" - about an eighth of an inch shorter than the figure I'd just arrived at.  I'll need to redraw those side panel curves with that station point included to make sure I don't have gaps in my hull at those points.  But that's only a few minute's worth of work.  And the discrepancy between the curve as I drew it and the curve it should be is only 0.125", rather than the 0.625" error.

Further, the error would have required a sudden concavity in the middle of a convex curve.  It would be very difficult to render that curve correctly; with the new figures, I need to produce a slightly greater convexity at that point, which is much easier.

So that's a big relief. After figuring out this problem, I traced the stem and stern posts onto the plywood, and figured out a way to sketch in the 13.75" radius curves for the deck beams.  At this point, the transfer of curves from plans to plywood is complete.  I hope to begin cutting the panels out tomorrow.  I need to order epoxy, fiberglass tape, etc., so that I'm ready to begin putting it together when the cutting is finished.

Thursday, June 2, 2011

Half-Inches

My brother and I have a little motto that has carried us through the tough parts of our Bolger Teal build.  It goes like this: "Anything error smaller than a half inch doesn't matter, because it's small enough to fill with epoxy, caulk and/or paint."  It was quickly shortened to the comforting mantra "Half-inches, half-inches" that we'd mutter reassuringly at each other whenever something lined up a little awkwardly.

I'm not sure the basic premise there is true, at least not for an "Instant Boat."  The Teal is almost done, and it's a bit asymmetrical.  Presumably, there were a couple half-inch errors somewhere along the way that actually did matter, but it's too late to go back and correct them now.  There are a few lessons to garner from this:

  1. Not all tasks during a boat build are equally critical.  A half-inch error drawing the hull shape might matter a lot more than a half-inch error in the placement of a thwart.  Some errors affect a whole chain of subsequent steps.  I suspect that an experienced boatbuilder has a very keen sense of which errors matter.
  2. The second lesson is that some building methods are more forgiving than others.  In a stitch-and-glue boat, I think the "half-inches" line is more true because there's the opportunity to adjust the shape of the hull during the "stitching" phase, before you lock in the shape during the "glue" phase.
  3. Finally, there is the important lesson that most of the asymmetries and wrinkles in our hull won't really matter when the boat's in the water.  Phil Bolger, the Teal's designer, drew up boats with ugly, boxy lines or even off-center masts, for crying out loud, and they all reportedly sail quite nicely.  As long as we produce a water-tight hull, it's unlikely that we'll ever notice the performance impact of the flaws we have introduced.

Still, I've gained a lot of confidence from the Teal project.  At the outset of the  build, it would have been paralyzing to hold myself to a millimeter standard.  Now, I'm willing -- and believe I'm able! -- to work more carefully, so I'm trying to drop the "half-inches" mantra and do the best work I can.  I'm not sure how much better than a half inch I'll manage, but I'm going to find out, at least.

As I traced the stem and stern posts for my Melanesia this evening, it was gratifying to see that I was operating (so far) within an error tolerance of around a half millimeter, rather than the half inch we allowed ourselves on the Teal.  Hopefully, this level of care will show in the finished boat, and will allow me to grow as a woodworker.

Lofting, Part 2

Lofting in the living room.  My three
sons help fit the batten to the curve
so I can trace it on the plywood.
I spent last night laying out the station lines and marking the points of the various curves.  This morning, I drafted my sons to help hold the batten in place while I drew the curves in for the side and bottom panels.

There are four major lines to draw in - each side panel has one curved and one straight edge, and the bottom panel is curved on both edges.  There are also a number of smaller curves to trace in, along the cutout in the stern end of the bottom, and the bow and stern decks.  On the longer curves, I tacked brads in at each station.  It was then a relatively easy thing to have the boys press the batten against the brads while I drew the curve in.  Brads weren't necessary on the smaller curves.

Everything went really well; the markings came out clear and it really looks like these shapes would make a boat if you joined them.  There was one point on the bow that I had marked at the wrong spot, but that was an easy fix.  More perplexing was a station point near the bow that just didn't match the rest of the curve.  It happened on both side panels, at the same (shared) station line.  I quadruple-checked the depth of the curve at that point, and at the adjacent points, and never found an explanation, so we ignored that line and drew the curve in using all of the rest of the points.  The only explanations that make any sense are that there's an error in the plans (i.e. that they give the wrong depth for that station), or that I mis-measured the location of that entire station line (i.e., that the depth is correct and would fit the curve fine if I moved it along the line).

Before I cut those panels out, I'll recheck the station line and contact the Wharram folks for verification of measurements given in the plans.

Stern post and stem post, traced onto office
paper to avoid cutting the plans up.  The stern
is on the left and the bow is on the right - the
difference in length gives some indication of how
much deeper the boat is at the bow than the stern.
The plywood now has the shapes of both decks, both side panels, and the bottom panel drawn in.   There are many smaller pieces that fit in the gaps between; most of those are either butt straps, lashing reinforcement pads, or stem & stern posts.  The butt straps are just patches to join the long pieces together, so they and the lashing pads don't need to be precisely shaped.  But the stem and stern posts are critical, and oddly shaped, so the plans include full-sized (1:1 scale) patterns of these pieces.

I was not willing to cut my plans up to trace the stem and stern posts, so I taped several sheets of paper together and traced them onto that paper, then cut the shapes out.  They came out really nicely.  Their shape somehow evokes the hull's form better (for me) than the side panels do.

Next I'll transfer the stem and stern post shapes to the ply, and then (assuming I get an answer on that point that didn't match the curve) I'll begin cutting various hull panels out.  That's an exciting prospect!