The fabric (a 4-oz ripstop polyester) is attractive and lightweight. One side is coated with a urethane treatment of some sort, so there's a slight color difference between the sides. But appearance isn't high on my priority list, and anyway, it'll look way better than a blue tarp would have.
 |
| Squeezing 57 sqft of sail into 5 yards of fabric. |
For a while, I was at a loss as to how to get the shape from the plans to the cloth. The plans list the length of the curved head and foot of the sail, and they list the length of the center of the sail, but there was no list of offsets at various station lines like there had been for the plywood. There was also some confusion as to how I could get the proper curve for the hollow at the open end of the crab claw.
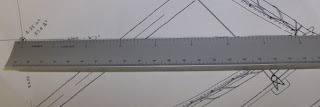
I had learned in my navigation class how to use an engineer's scale to read a measurement from a nautical chart, and I had heard somewhere that you can do the same thing with boat plans. So I got the engineer's rule from my nav gear and confirmed the width of the sail at the top, which allowed me to determine that the sail curves inwards one foot from the tips to the center. Once I've joined the two halves, I'll draw that curve in with a batten.
I decided the best way to get the shape of the long curve onto the cloth would be to carefully mark the three corners, then mark the length of the curved side on a batten, and then use exactly that much batten to draw in the curve. My boys helped again - they're getting to be pro's after the plywood drafting job.
I soon had the shape of the two sail halves drawn in, but it would be a mistake to cut along those lines. The center seam needs some overlap, and it takes fabric to enclose the rope that's supposed to strengthen each edge. So I traced in a second line in a different color, 1.5" from the edge of the sail, and this is the line I cut.
When it was all done, I had two halves of a crabclaw sail. I couldn't resist the temptation to lay them out together to get a sense of the full size of the thing. At 57.5 sqft of sail area, it's a pretty powerful rig. Setting it out in the living room brought that home a bit - it seems bigger than the sail for my El Toro dinghy, which weighs about the same.
Next up in sailmaking: I'll be pinning and stitching the center seam together. I also need to procure some rope for the edges so I can sew those in. I may also cut some reinforcement radius pieces for the corners out of my meager scrap pile. It seems smart - most sails have reinforcement patches there.
Meanwhile, I still have interior epoxy coating to do. Everything is supposed to get two coats, with a bit of sanding between. And if I'm close to having a sail, I really ought to consider getting the spars finished. Plenty to do!


Hi Rich,
ReplyDeleteWoohoo - looking good.
I have a few questions & comments if that's okay?
The error in the plans - is this only with Imperial measures?
I like your idea of hoisting the hull sides up out of the workspace - I can do that.
I like Tim Anderson too - excellent adventurer and writer. I checked your link and am unclear on the detail of Tim's sailcloth join. Does it still leave an edge exposed? An alternative would be to fold two joins, one upwards, one downwards and tuck/fit the edges inside the fold of the other. I'll see if I can scan an image and forward it on for your reference.
you've given me an idea to begin sailmaking or smaller projects, these it winter days are short for outdoors work.
Many thanks, Terry
Hi, Terry. The error was in the imperial measurements only, yes.
ReplyDeleteTim's felled seam illustration is here:
http://www.mit.edu/people/robot/yucatan/drawing3/lapcrease200g.gif
I think you could fold the cut edge over before stitching it, if you were worried about fraying. Maybe I'll do that, I hadn't thought about fraying.
Hi Rich
ReplyDeleteThe seam I a thinking about is fairly common. If you can imagine teo people fingers bent interlocking, one with palm facing up, the other with palm facing down.
Both edges of the cloth remain hidden. No fraying and looks neater, and may be stronger. Regards, Terry
Oh, I like that idea. I think it's too late to switch to that seam on my sail, but if my seam fails, I'm definitely going to try that on the Mark 2 version.
ReplyDeleteHi Rich
ReplyDeleteIts blowin' a gale (well more actually) here . . . a good day for sail making.
I've just read Wharram's un-detailed plans. Wow! I remained at a loss till I recalled something about this on your blog.
Thanks to you I now have something to work with. Without a scaled rule I'll have to measure the plans then x 10. (I think!)
I wonder how many really flat Melanesia sails there are out there?
Thanks. Best, Terry.